Why Blow Molding?

Blow molding is a fast and economical manufacturing process used to produce hollow plastic parts, but traditional tooling often slows down the development cycle. In high-volume manufacturing, the path from bottle design to the production line is a months-long journey involving expensive metal molds. By leveraging 3D printed blow molding tools through SLA (Stereolithography) and DMLS (Metal 3D Printing), Proto3000 helps manufacturers bypass these traditional bottlenecks, ditching the high costs associated with design changes and enabling rapid testing in final production plastics.

Speak with an Applications Engineer

The Serioplast & Unilever Case Study: A New Standard

Global packaging leaders, Serioplast and FMCG giant Unilever®, proved that 3D-printed molds aren’t just for “looks-like” prototypes—they are functional manufacturing tools. By switching from machined aluminum to Formlabs®’s Rigid 10K Resin, they achieved:

  • 90% Cost Reduction: Tooling costs dropped from $2,500–$10,000 per mold to just $500–$1,000.
  • 70% Faster Lead Times: Pilot testing that once took 6–8 weeks was completed in under 2 weeks.
  • Production Realism: They produced functional PET bottles using the same machines and process windows as the final production line.

Study Case

Image of 3D printed molds for plastic bottles prototypes

The 3D Printed Blow Molding Process

By utilizing industrial 3D printing, we eliminate the 6-8 week wait for traditional metal tooling. We match your production needs to the right technology:

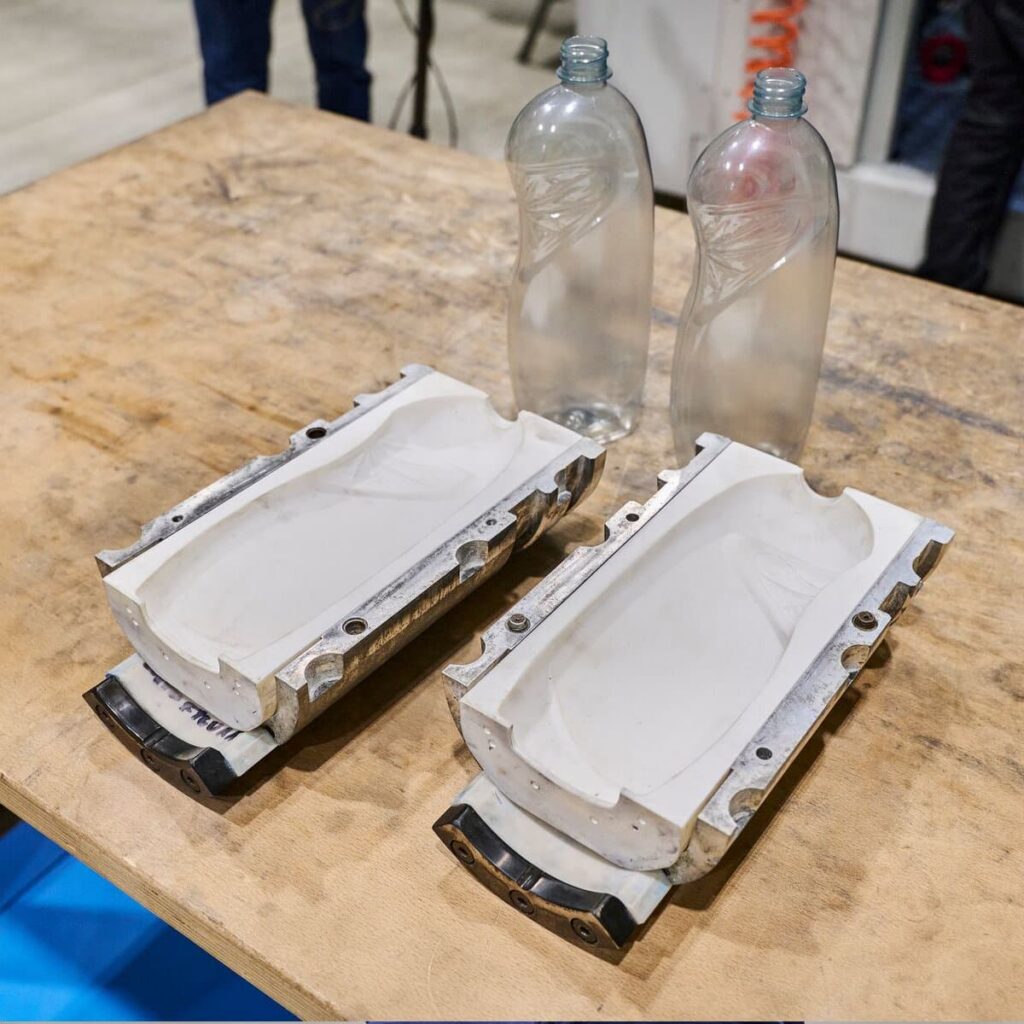
  • SLA (Stereolithography): Using materials like Rigid 10K, we create glass-filled mold inserts capable of handling 30 bar of pressure and 218°C heat. Perfect for 100-1,000 functional PET samples.
  • DMLS (Metal 3D Printing): Direct Metal Laser Sintering allows for conformal cooling channels that follow the bottle’s shape, reducing cycle times and improving part consistency for longer runs.
  • FDM (Fused Deposition Modeling): Ideal for large-scale industrial containers and master patterns using high-strength thermoplastics.

Traditional vs. 3D Printed Tooling

Process Machined 3D Printed
Lead Time 6 – 12 Weeks Under 2 Weeks

Types of Blow Molding

Extrusion Blow Molding (EBM)

An extruder drops a parison (hot, hollow tube of plastic) between two mold halves. One end of the gap is sealed while the other end is left open. Air is injected through the open end, forcing the malleable plastic against the mold walls. Upon cooling, the plastic retains the contour of the mold. This process can produce very large containers but is not suitable for all materials.

Injection Blow Molding (IBM)

This two-step process begins with injection molding a preform, which is then heated, placed in a blow mold and inflated. Compared to EBM, this process allows for more careful control over part walls and results in better transparency and surface quality.

Injection Stretch Blow Molding (ISBM)

This method incorporates an additional step where the injection–molded preform is heated, then mechanically stretched before inflation. This contributes to the part’s strength and wall uniformity.

Industrial Applications

Our 3D printed tooling solutions are designed for real-world manufacturing environments:

  • Pilot Runs: Validate designs in final production plastics (PET, HDPE, PP) before mass production.
  • Filling Line Trials: Test downstream equipment like star wheels and capping machines with production-accurate bottles.
  • Market Research: Get “real-feel” prototypes to consumer focus groups in days.

Steps to 3D Printed Success

  1. Design: Optimize CAD with proper draft angles and integrated venting.
  2. Print: Utilize high-precision SLA or DMLS systems for dimensional accuracy.
  3. Finish: Post-process critical surfaces to achieve the required bottle transparency.
  4. Mold: Mount inserts into a standard frame and begin blow molding on your existing production machinery.

Tell us about your project