Footwear design is a complex category that has much more in common with automotive design rather than fashion disciplines. Ergonomics, mechanics, different materials, and aesthetics all contribute to footwear design.
Step 1 – Set Realistic Shoe Goals
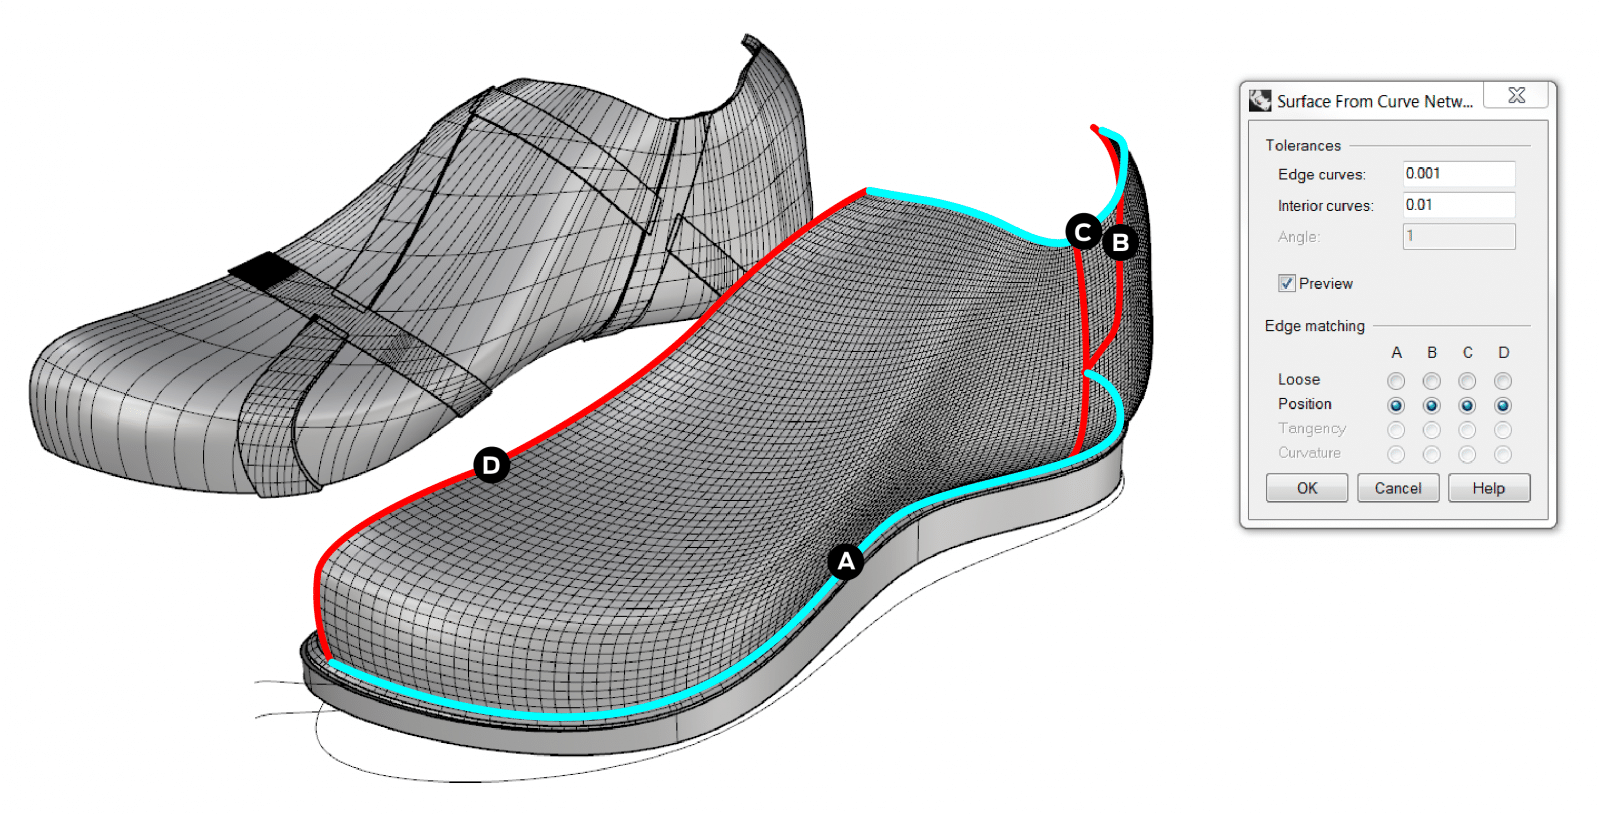
By splitting the shoe category into two components – sole and the body, you are able to break down the anatomies that rely heavily on interrelated components. In the diagram below, you can see how Josh Snider began to define different planes on the body.
Rather than focusing on designing a revolutionary shoe, Snider put the focus on the sole in order to test parametric design tools and study exotic geometries. You’ve more than likely witnessed the cross section of a running shoe sole, some of which are transparent. Honeycomb or lattice geometries are used to optimize high impact resistance and low weight. This holds great opportunities to explore other parametric lattices which can be easily iterated on to change specific performance requirements.
Step 2 – Create Parametric Lattices
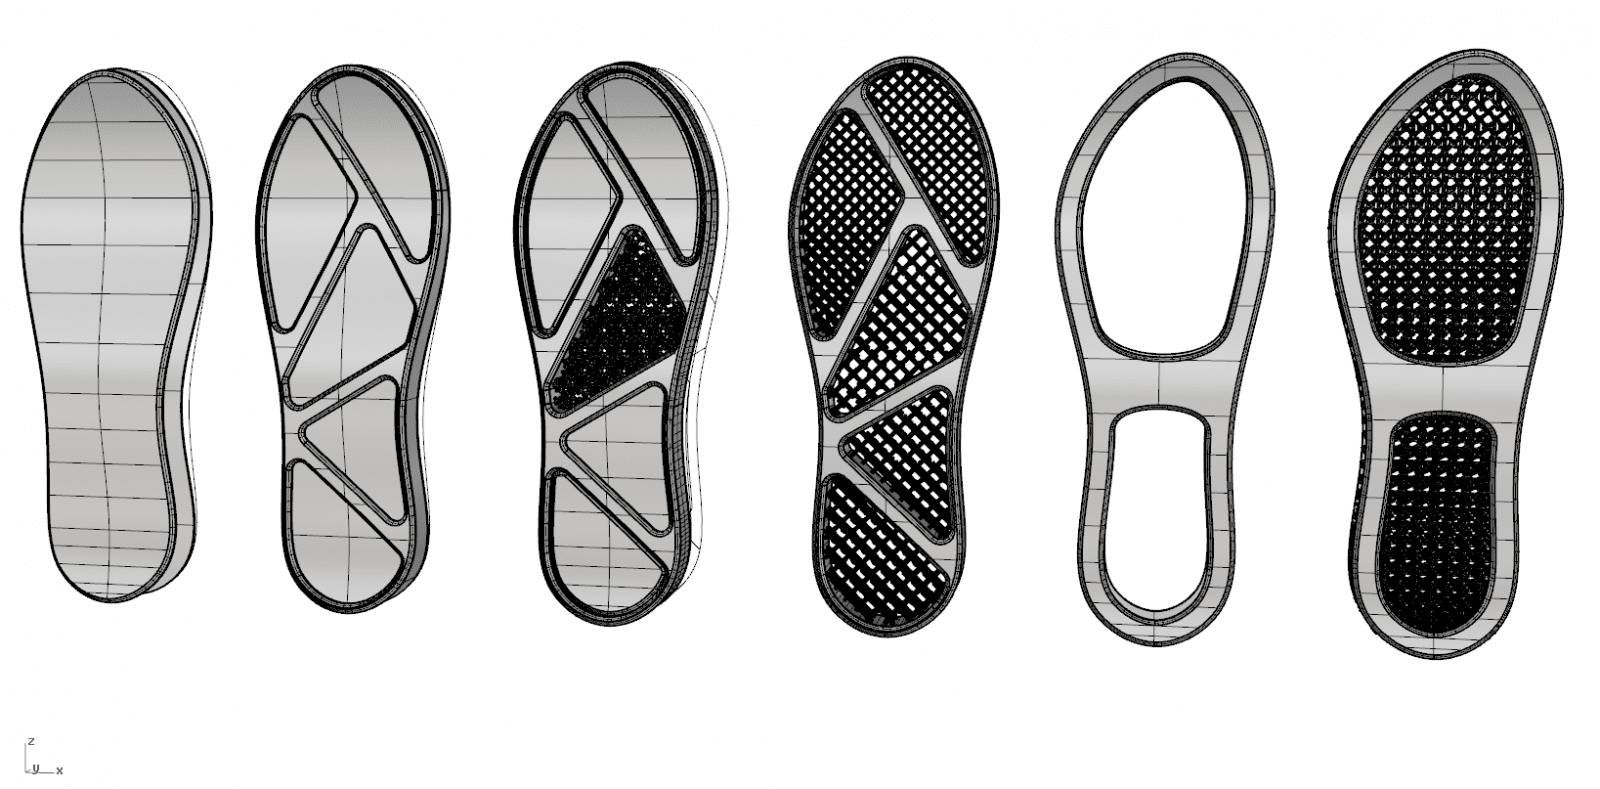
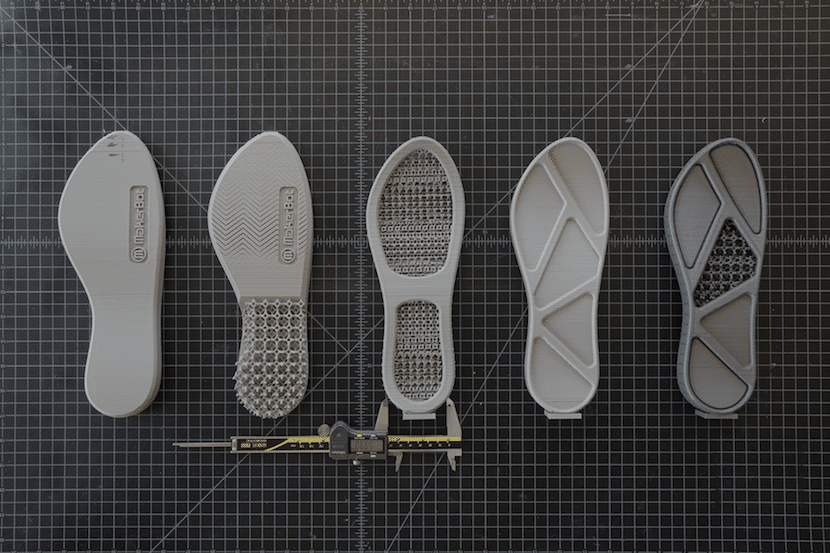
Grasshopper is a graphical algorithm editor used to run in Rhino and also allows the user to create geometries with dynamic parameters in an intuitive drag-and-drop space. Parametric tools are extremely powerful when used with a 3D printer. Once geometries for different lattices are defined, the user has the ability to explore many different versions of the pattern in a short period of time. Then, export a sole with a wide pattern, a tightly grouped pattern, and a thin pattern.
Step 3 – Prepare Soles For Printing
With many 3D printing technologies out there, there are many sets of advantages and disadvantages, materials, tolerances, speeds ect. Adidas is a prime example of 3D printing a shoe which validates using 3D printing technologies for cost-effective, short running manufacturing.
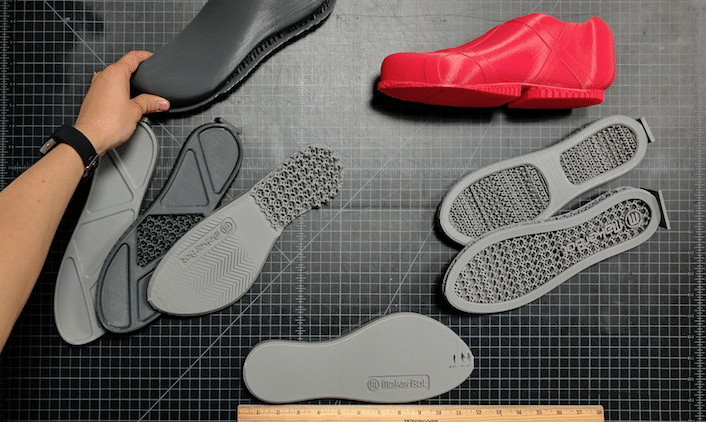
In early studies, springy high-tech plastics which will make up the final show are not required. Only speed, reliability, and accuracy are necessary. With this specific case, FDM is the ideal platform. Using MakerBot’s Replicator+ is a true workhorse for rapid prototyping.
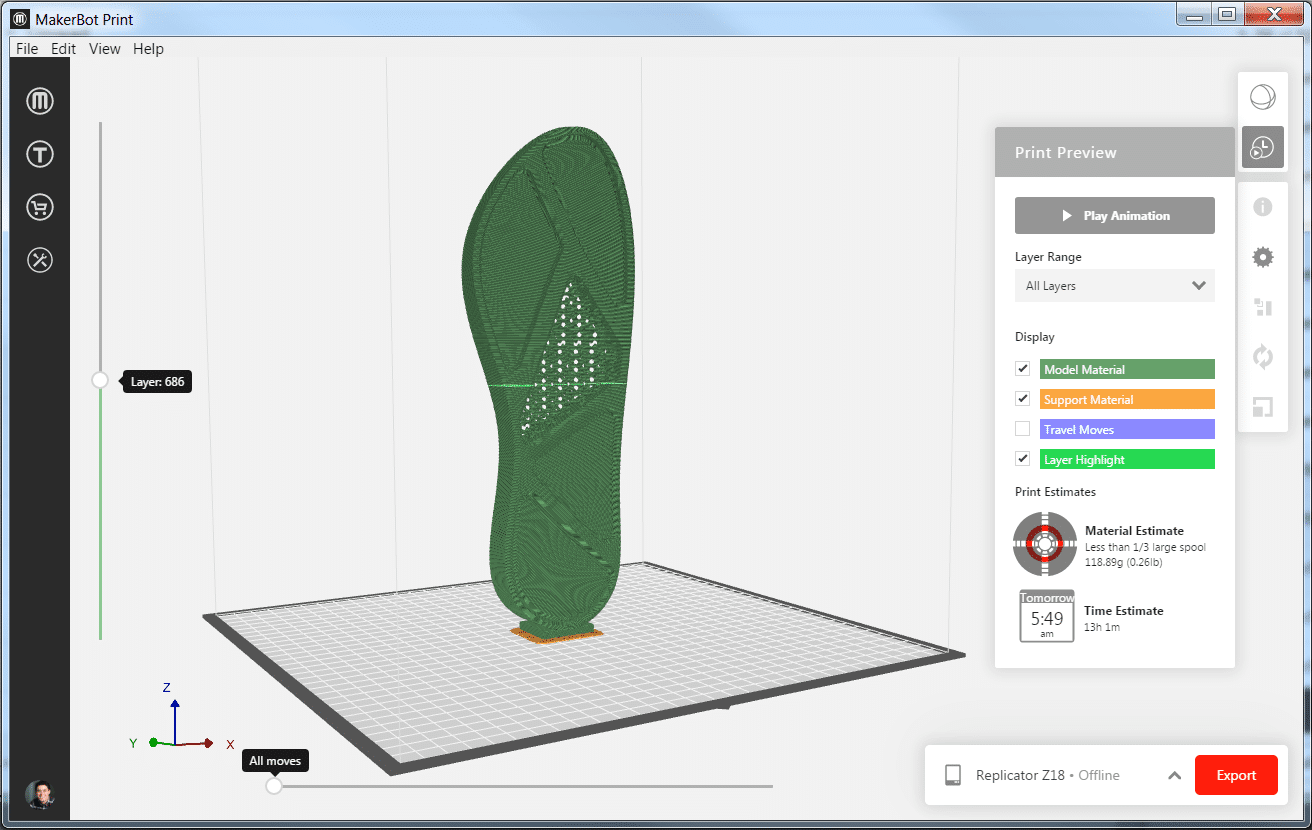
Snider then drags the first batch of iterations into MakerBot Print which will give slicing preview to confirm the STLs are imported correctly. After its been imported, adjust the print settings and begin with a sturdy arm. 0.4 mm layer height for the first iterations are necessary. After confirming the layer height, test the 0.3 mm and eventually stick with 0.2 mm, which is a layer height that offers the right balance between surface quality and structural integrity for this particular print.
Step 4 – Explore Applications For Lattices
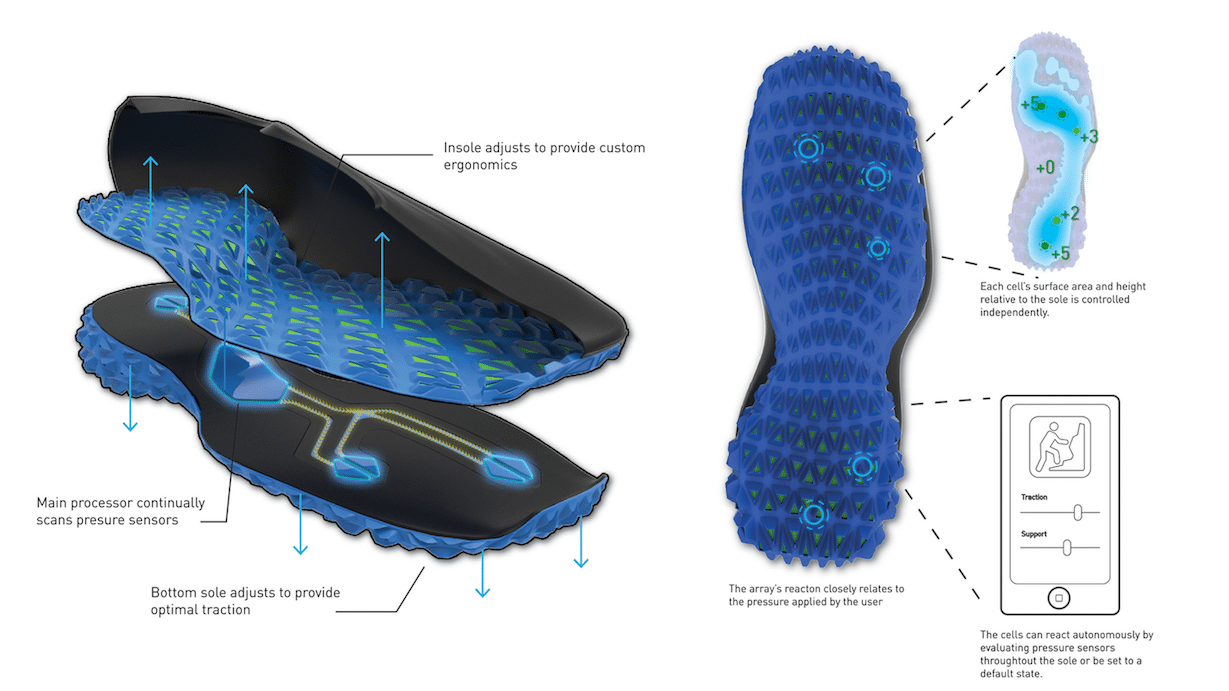
Parametric geometries that were set up could serve multiple purposes. After printing a variety of soles, Snider considered how gradient that transitions from tightly grouped lattice to a more loosely grouped one could distribute and direct force away from high-impact zones.
Parametric models are becoming more and more crucial as the foundation for generative design techniques that incorporate huge data sets for things such as material properties and force simulations.
Step 5 – Revise and Reprint
After going through five unique variations, Snider decided to focus on the one that gave the best balance of aesthetic and functionality. There are some stylized and functional lattice at the ball and heel of the sole, localized to the most relevant areas, but not so much that it begins to add visual noise or interfere with the overall shape and look fo the shoe.
Step 6 – Print the Sole and Experiment with Materials
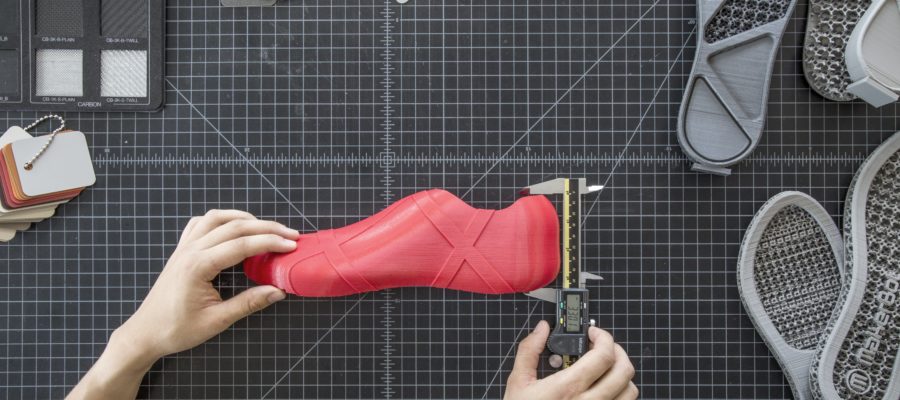
Snider had the ability to prototype the shoe’s body and sole in some different flexible plastics, adding extra layers when using MakerBot’s Experimental Extruder. Then, Snider used community tested material profiles from the Thingiverse group for MakerBot Labs, then imported them into MakerBot Print and fired up a sole with a popular flexible material called NinjaFlex.
This exercise was a extraordinary way to experiment parametric design in an nonrestrictive way. Ultimately, these complex as well as uneven geometries prove to be a great source for concepts which can only be created with a 3D printer, assisting designers to push the boundaries of what products and technologies are possible in footwear design and other fields.