Repairing And Checking VRMLs
This is part 2 of a series of tutorials in order to assist printer operators who aren’t graphic artists to get the absolute most out of their multi-colour, multi-material 3D printers, like the Stratasys J750. This will cover how to look deeper inside the VRML files to predict if they will import correctly and how to choose the resolution of VRML files from Rhino and other artistic CAD programs to ensure they are capturing correct information.
Step 1: Why Are VRMLs Required?
In the last tutorial, we mentioned how most engineering CAD programs such as SOLIDWORKS, Creo, Inventor and CATIA do not retain texture information when sending files in native, STL, or VRML format.
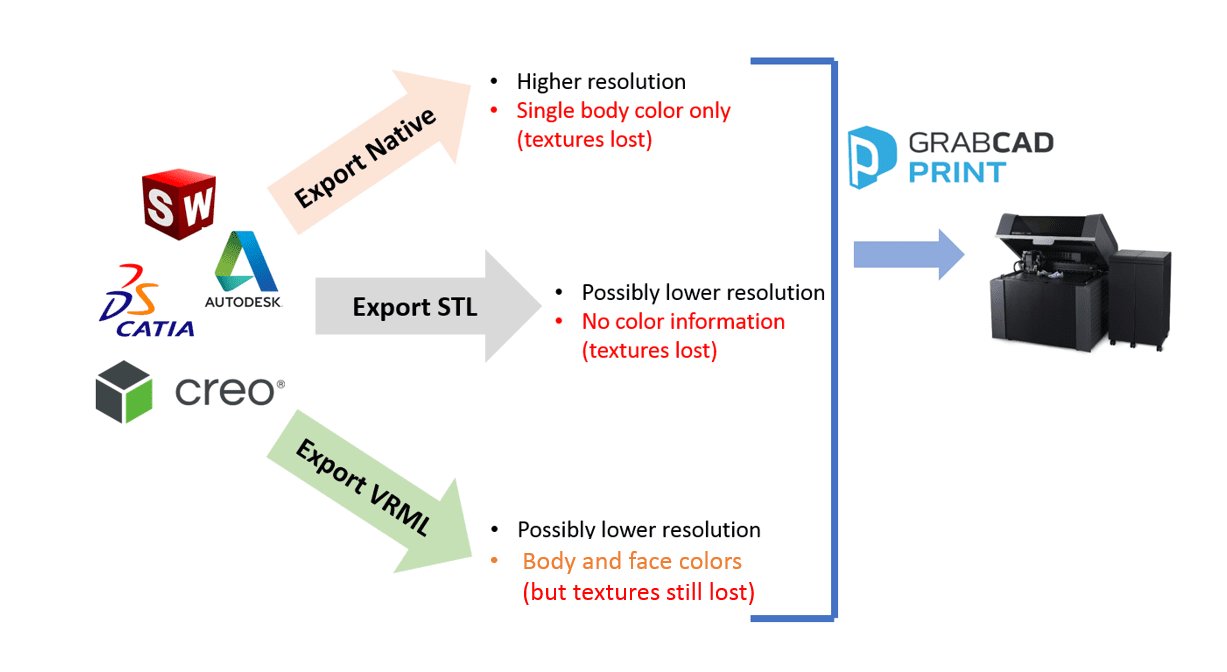
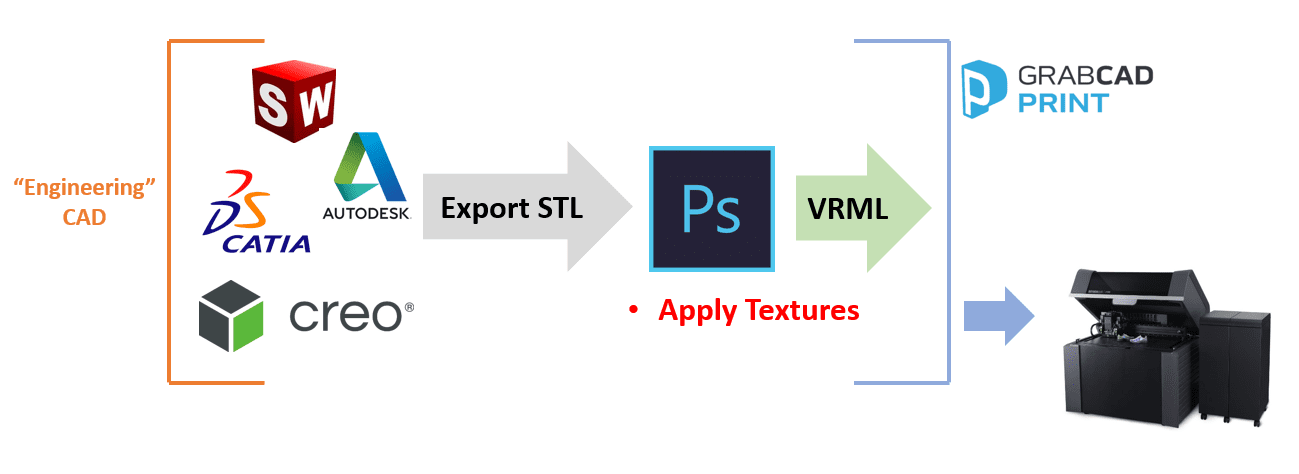
To overcome this, we mentioned where you can export STLs from your CAD package, then re-applied the texture inside Photoshop, finally exporting a VRML to GrabCAD Print for printing:
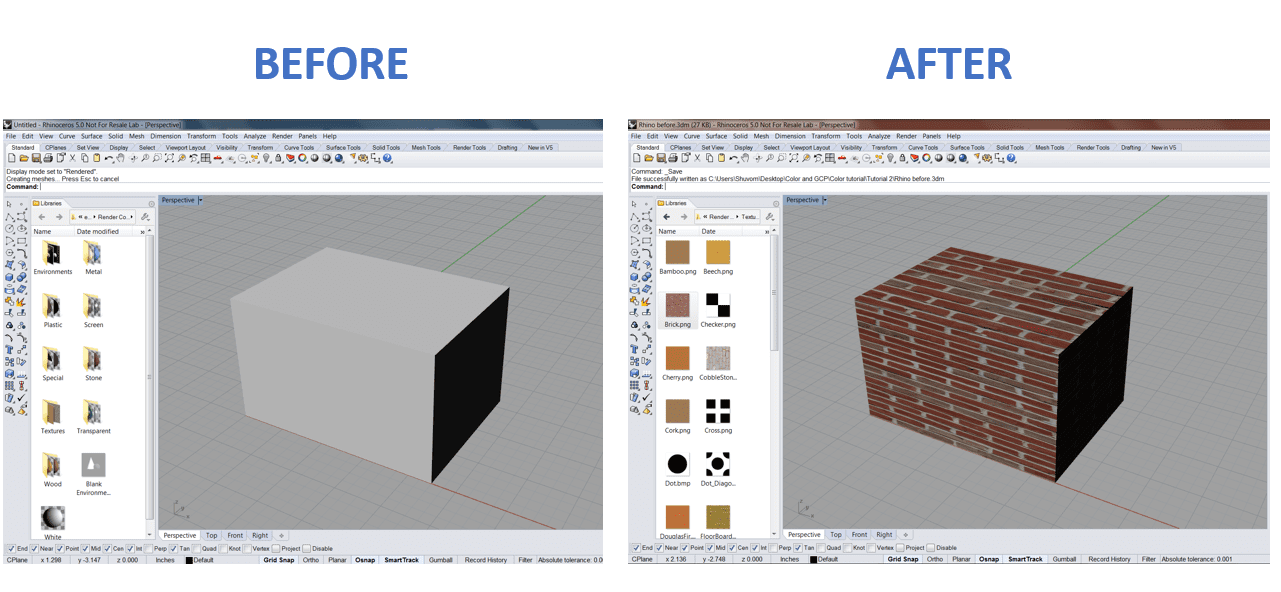
However, that isn’t the entire landscape. Besides engineering CAD, there’s a variety of ‘artistic’ CAD that graphic designers and animators use. If you select the correct settings, some of the programs can export VRMLs with full-colour textures still attached:
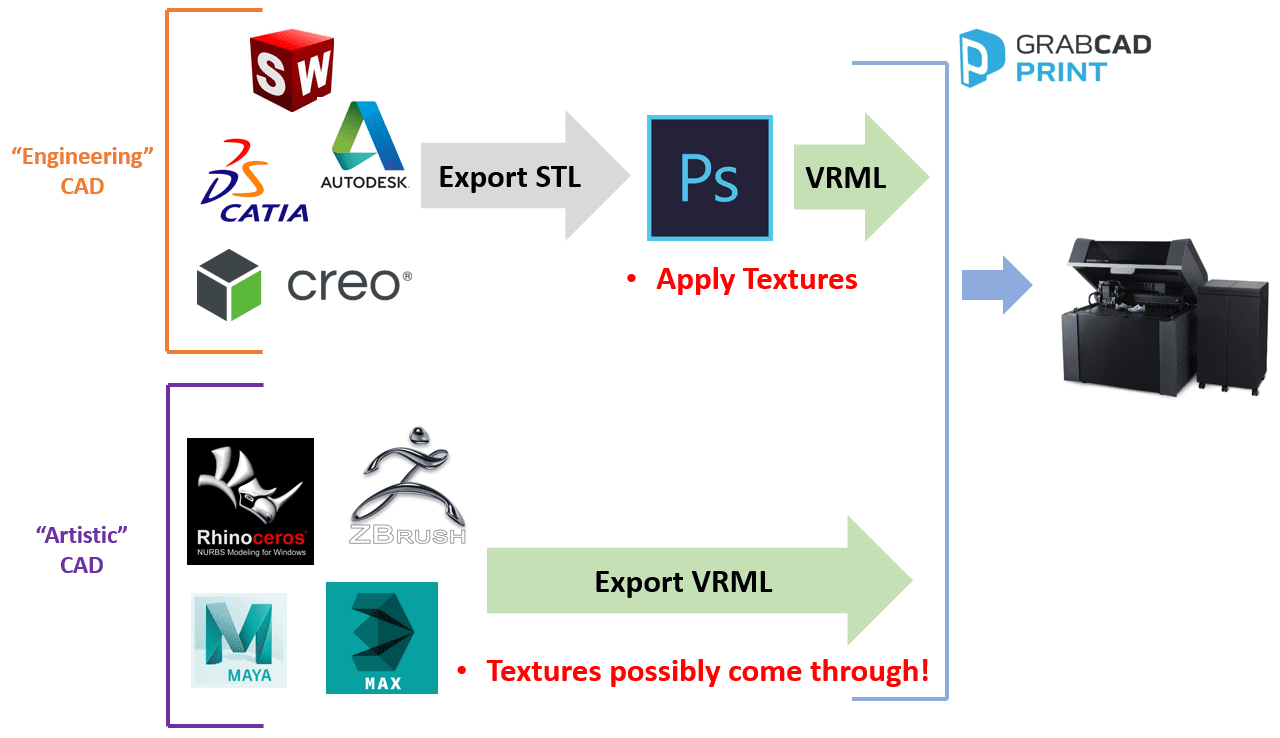
In either case, the end result to carry your geometry and texture information into your print preparation tool will be a VRML file. At this moment, GrabCAD Print doesn’t import textures for .OBJ or .FBX formats. Reports show that Maya 2016 no longer exports VRMLs. If applying textures in Maya 2016+, you’ll probably need to export an .OBJ or .FBX, then convert to VRML in some other software like Photoshop or Magics.
So, if you plan on leaning heavily on VRML formats for carrying texture information to our 3D printers, we should learn to look inside them.
Step 2: Reading A VRML In A Text Editor
In order to comprehend why some VRMLs work with 3D printing and some do not, we have to learn how to examine the raw data inside.
You may open any VRML using any text editing program, such as Notepad, Wordpad, and Microsoft Word, and get a look at the data inside, even if it is a little hard to read:

A majority of the text data will not be useful to humans, however, there are a few crucial things to take into considerations:
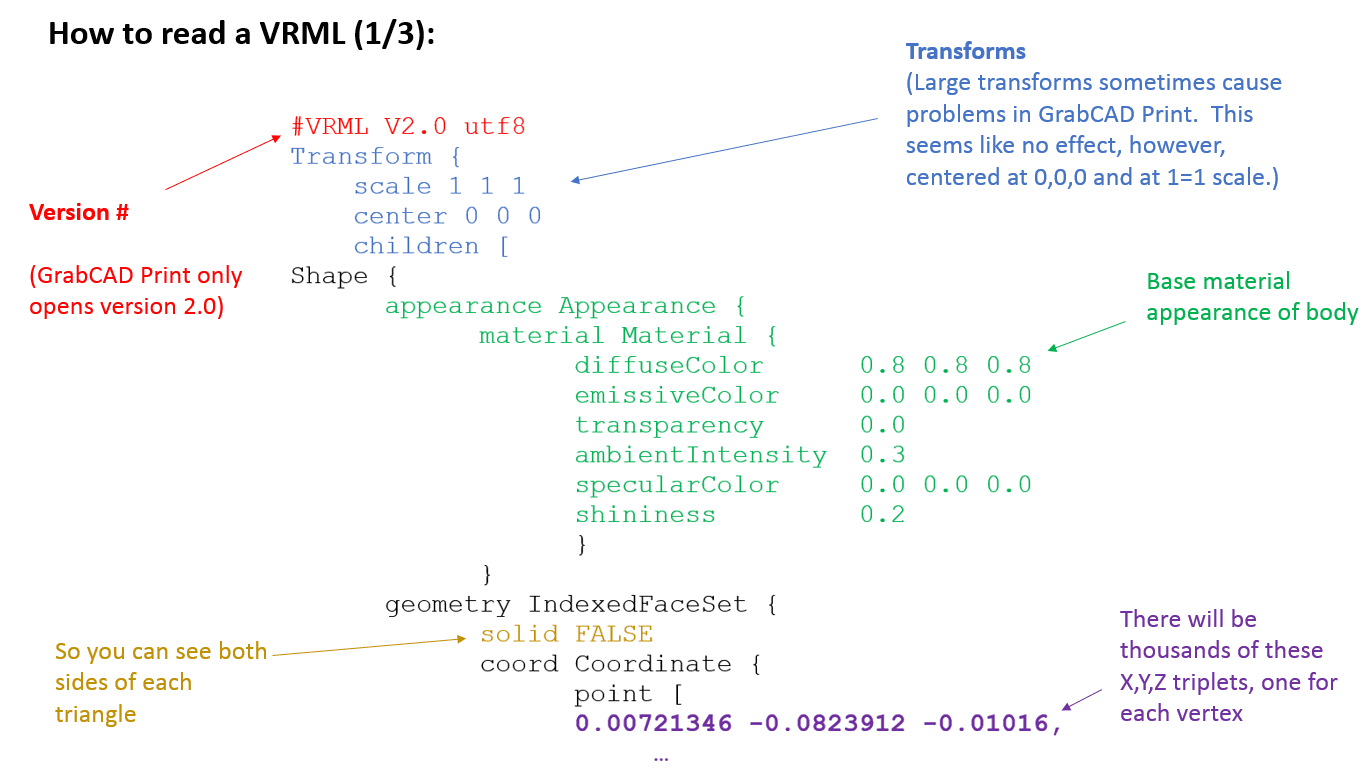
First off, check that the VRML is version 2 (red), the more recent version, and the only one which GrabCAD Print can read.
Secondly, large transforms which wildly deform or scale the triangle data(blue) sometimes cause problems during layout and texturing, and this section is usually at the top, so check for that too.
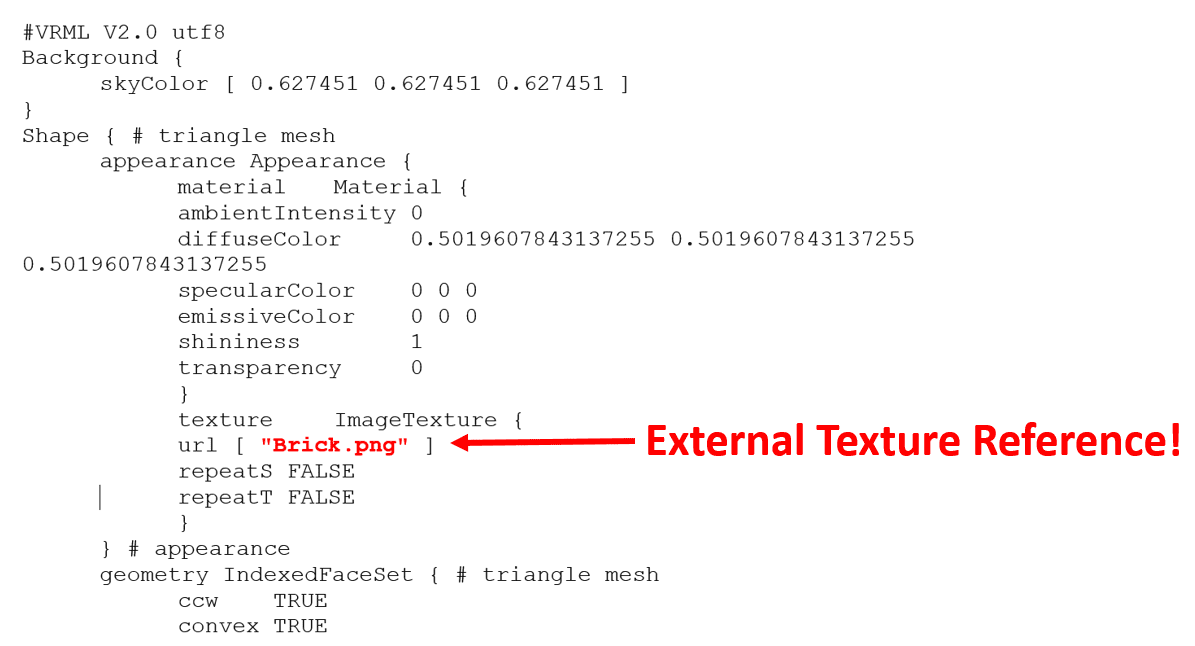
The base material appearance (green) sets the default look of the material. At times, there’s an image path there (brick texture.png, ect) that is important to note.
There will be thousands, or even millions of XYZ coordinate points which are purple, that are the actual location of each vertex making up our triangular mesh. You can skip past those if you choose.
Below, the triplets that were replaced with a thousand lines with “…” might be information on how each vertex is coloured (colourPerVertex) in red.
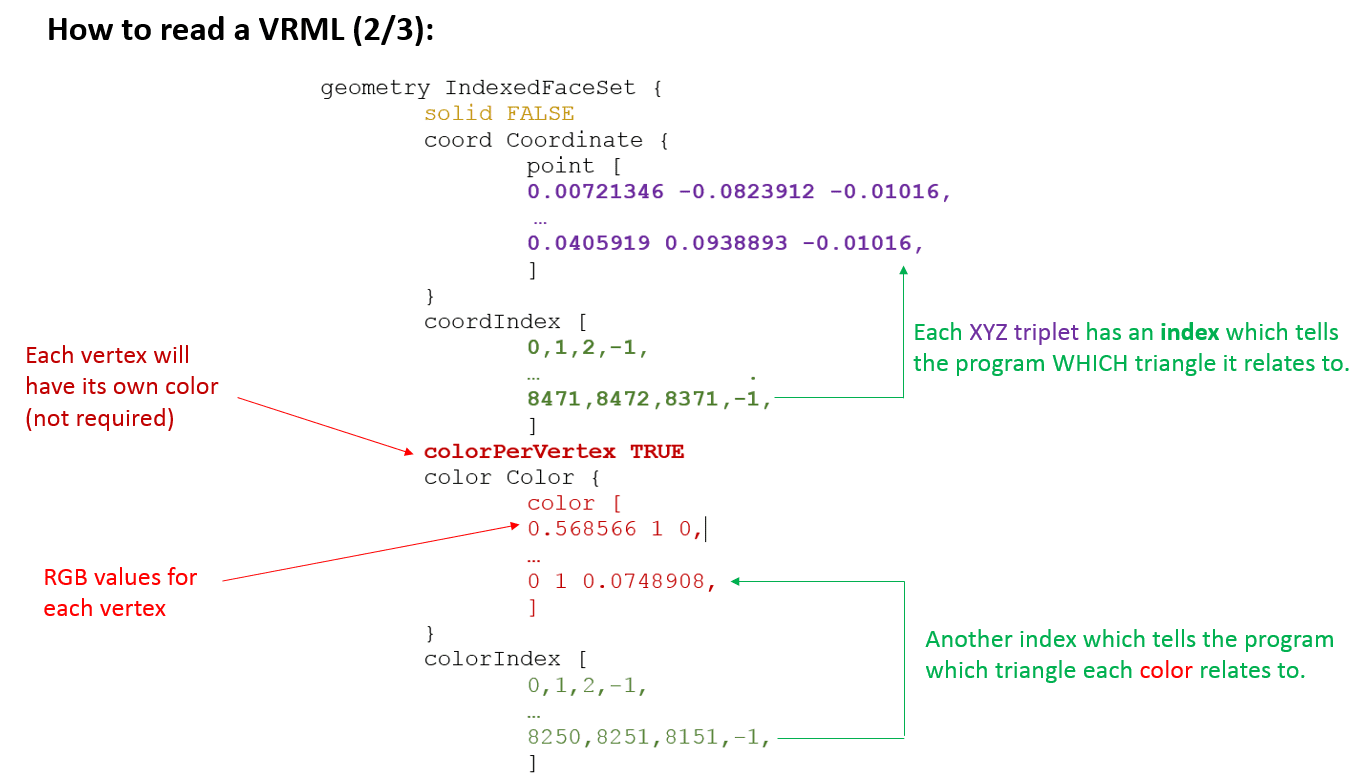
VRMLs formatted by Colour Per Vertex will be substantially larger than normal since all the RGB values vertex must be separately listed out in the VRML (above, in brighter red) rather than being stored in an external JPEG or PNG.
Checking for “ColourPerVertex” is typically a good step if you suspect your VRML is too large and causing performance issues.
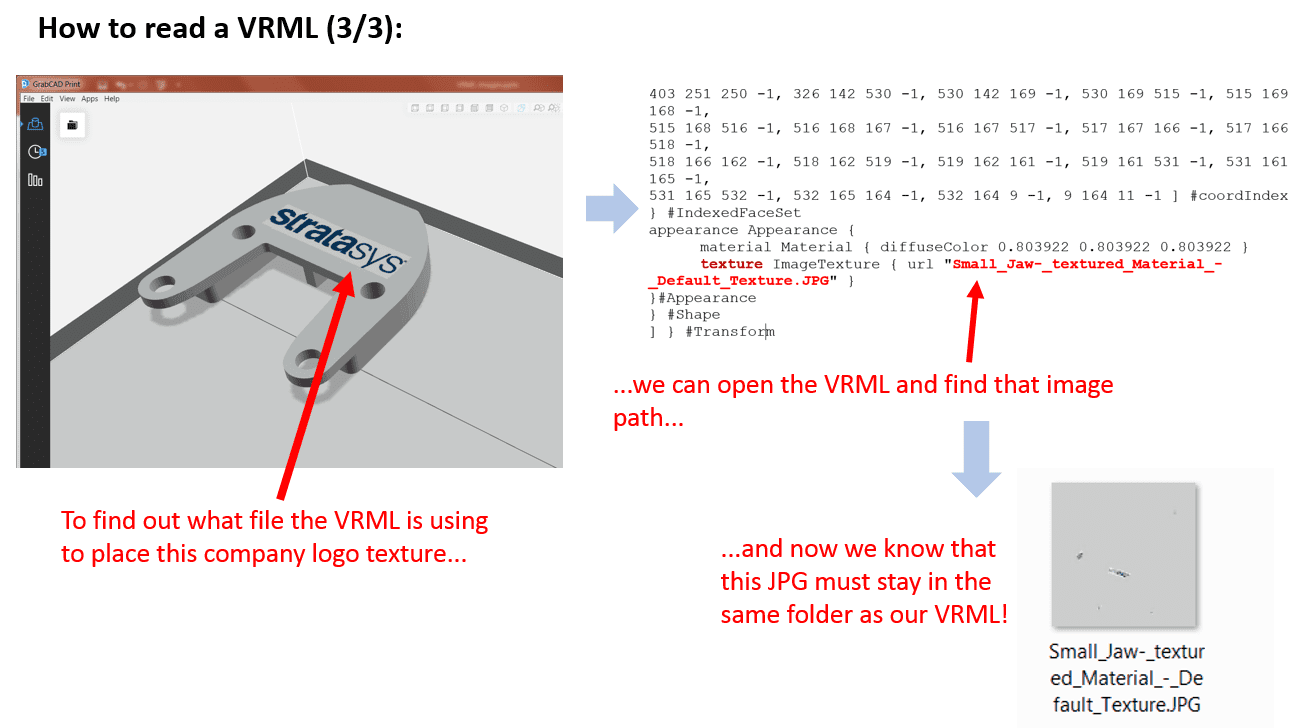
The last thing to search for in the problem VRMLs is a CTRL+F for the word “texture”, to see if there are any external texture files the VRML needs to reference during open:
In great formatted VRMLs the indentation level will guide you on where the data belongs, and there will be a closed bracket for every open once, etc, helping you know when a section ends.
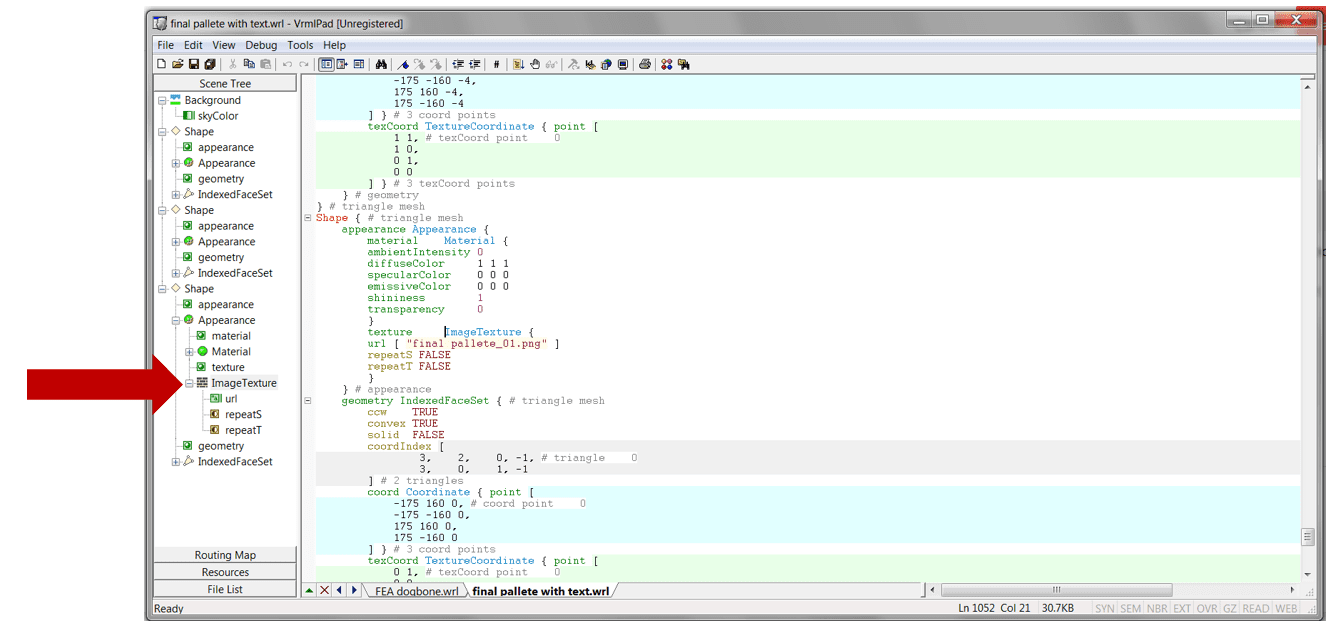
If you really want to take a deeper dive into reading VRMLs as text, we just learned about this software called “VrmIPad”. It’s basically a notepad editor for VRMLs with the colour coding and section breaks already built in.
Step 3: How Do We Use This Knowledge?
The above information was pretty heavy. You probably want to know if any of this is applicable in real life? Well, let’s say you were doing a test to see if textures applied in Rhino correctly export for printing as VRMLs. To begin, you’d apply a full body material texture in Rhino:
If you save a VRML from Rhino and try to open it in GrabCAD Print:
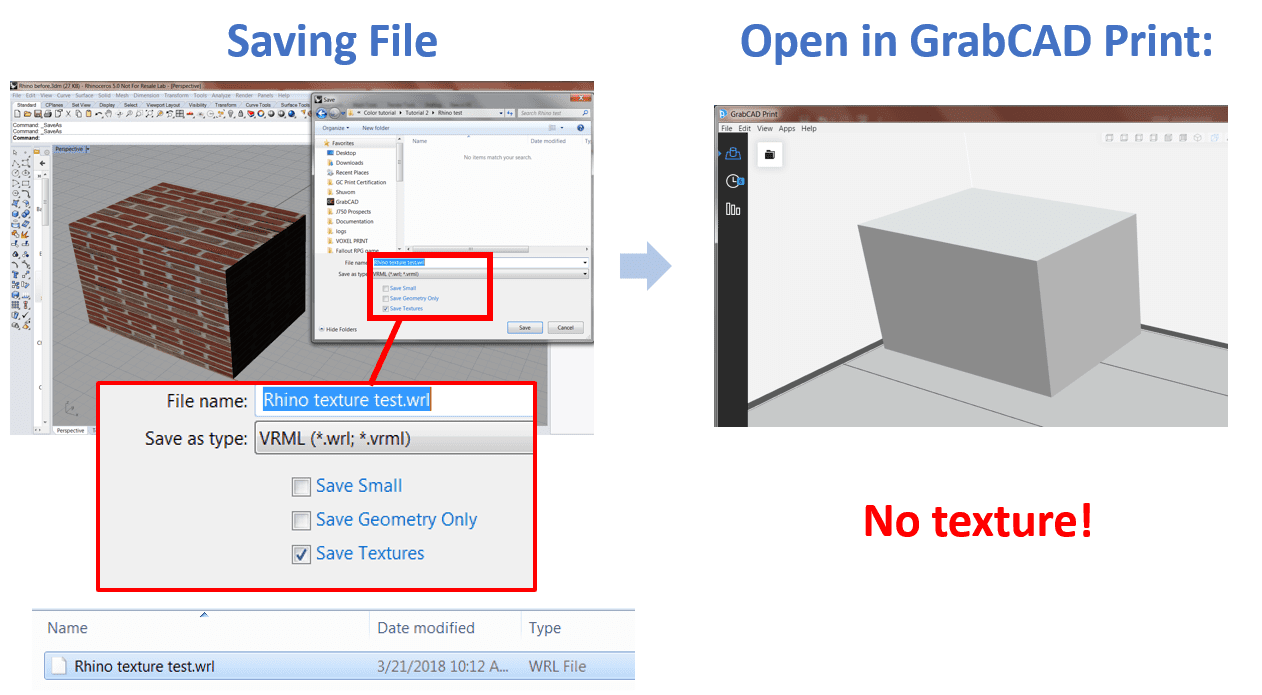
You may now think that Rhino is “broken”. That it can’t correctly export material textures as VRMLs to show up for printing. However, you might remember that you can open VRMLs in text editors to search for external texture paths:
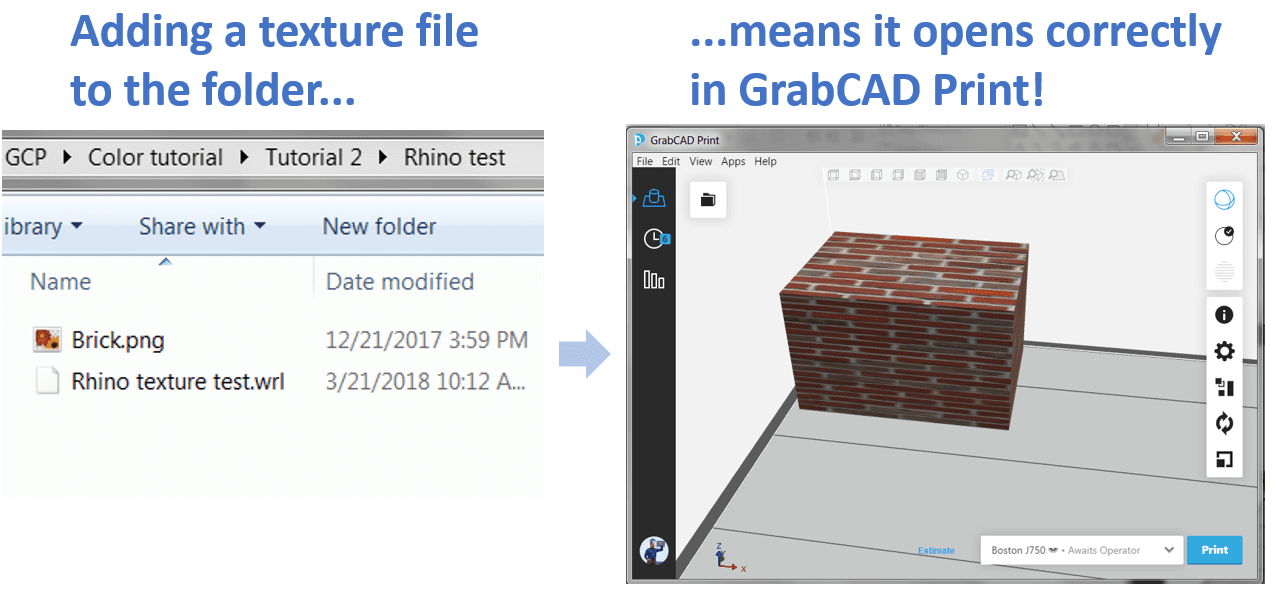
If you find that Brick.PNG file deep inside your Rhino install directory, copy it to the same folder as your VRML, then the file opens (and should print) in GrabCAD Print correctly:
This test has not been done for every single CAD package out there, but people reading this can let us know in the comments below how Maya, 3DsMax, Zbrush, Blender, CREO, Inventor, CATIA and even the different years of SOLIDWORKS do exporting textured in VRMLs for printing? Ensure to look inside the VRML text the correct path before saying “it doesn’t work!”.
Perhaps the list of CAD systems that can correctly export textured VRMLs is larger than anticipated?
Now that we have the tools required to tell if textures are importing correctly through VRMLs, let’s move on to one more controversial aspect of “artistic CAD”-to-print export: the resolution of the file.
Step 4: Choosing the Resolution of Your Export
Suppose you’ve gotten this fun Earthworm Jim type character in Rhino that you’d like to 3D print:
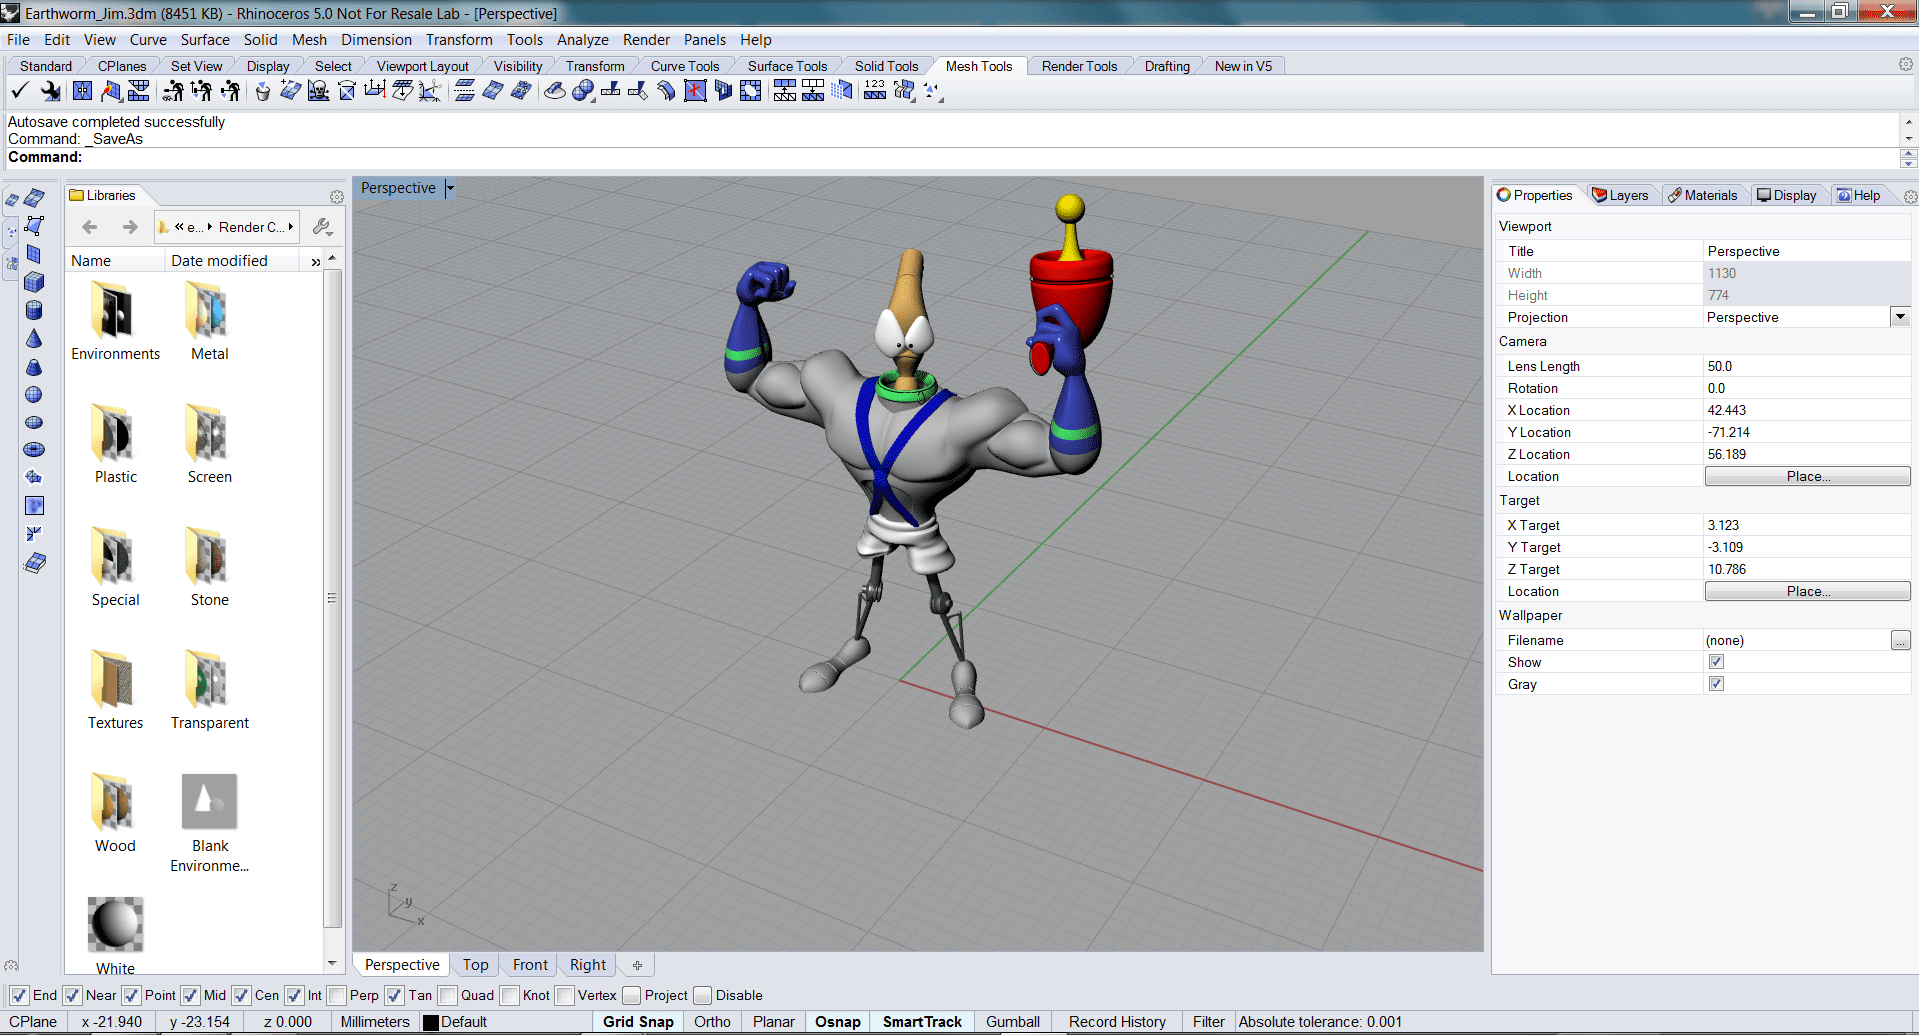
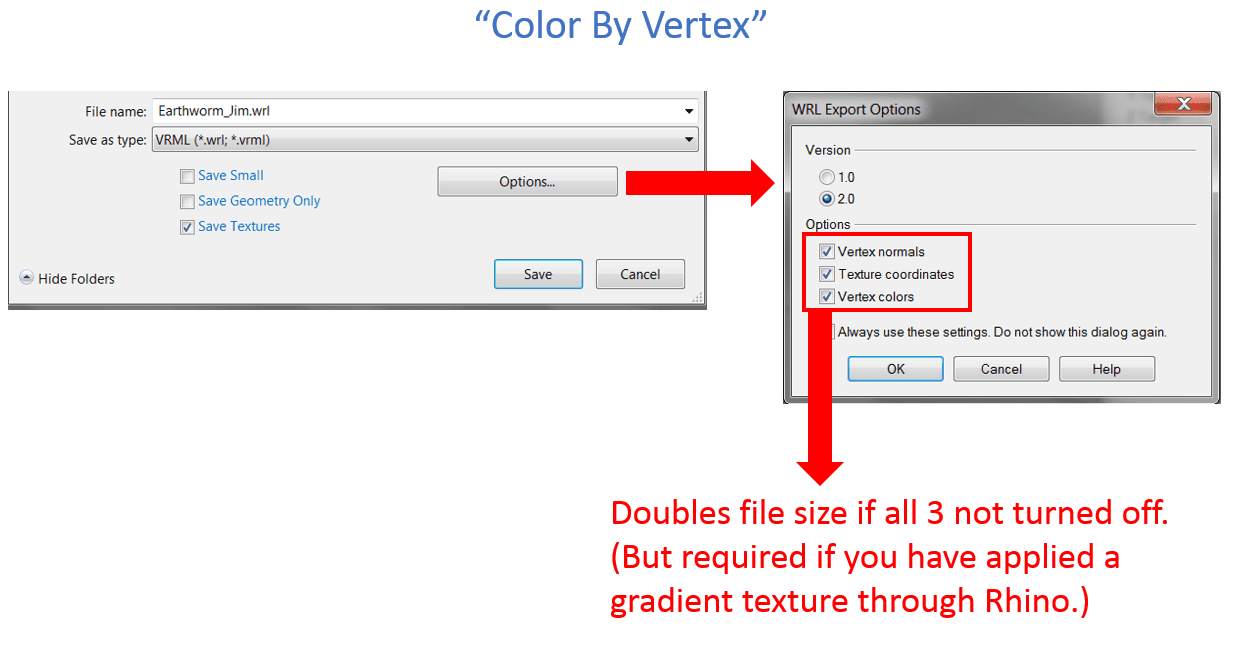
Above is an example of GrabCAD user Syaqil Ng who uploaded this awesome model for all to use! If you go to “File..Save as” and choose VRML, you get a few choices:
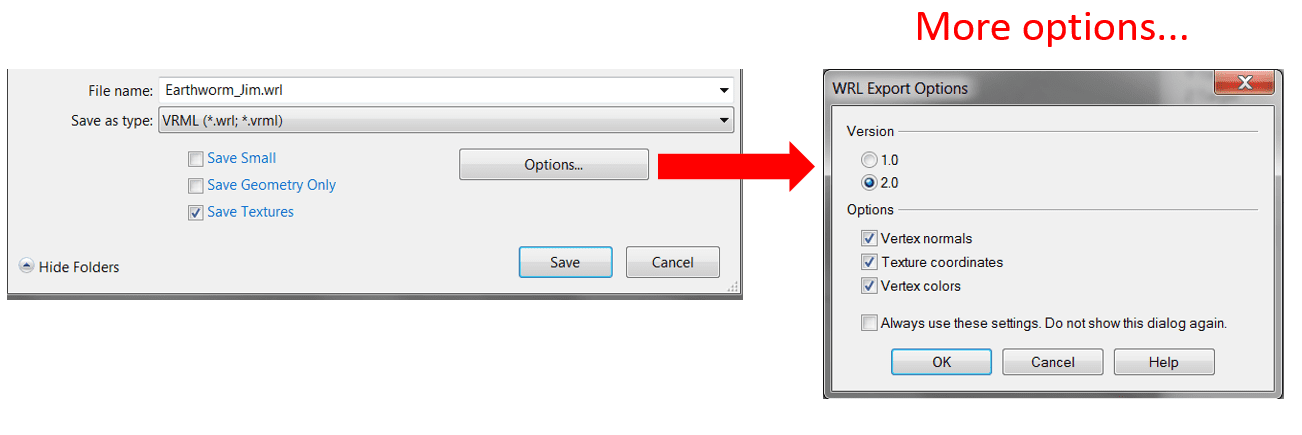
From previous steps within this tutorial, you know you should select “Version 2.0,” and that if you choose “Vertex Colours,” your file will be much larger.
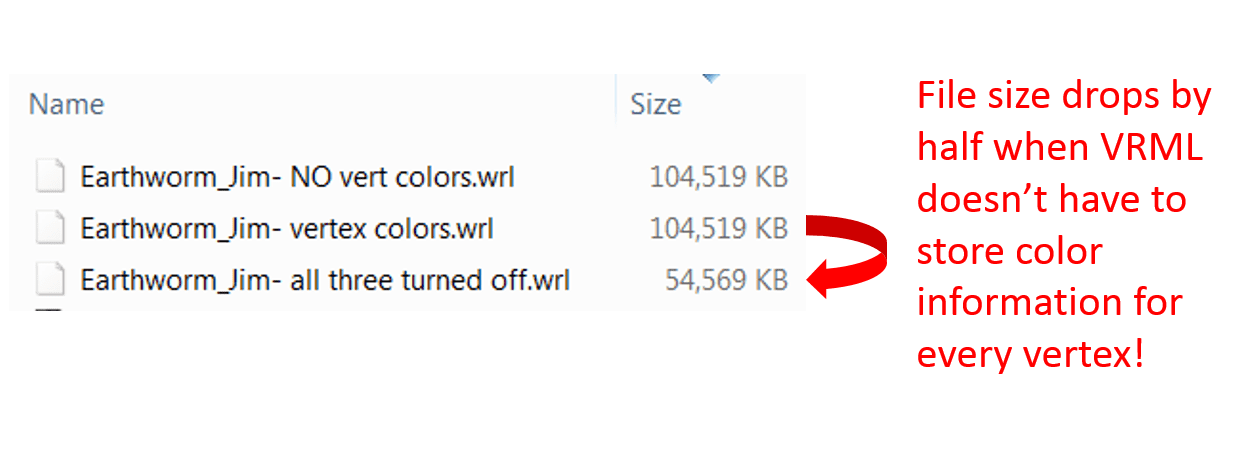
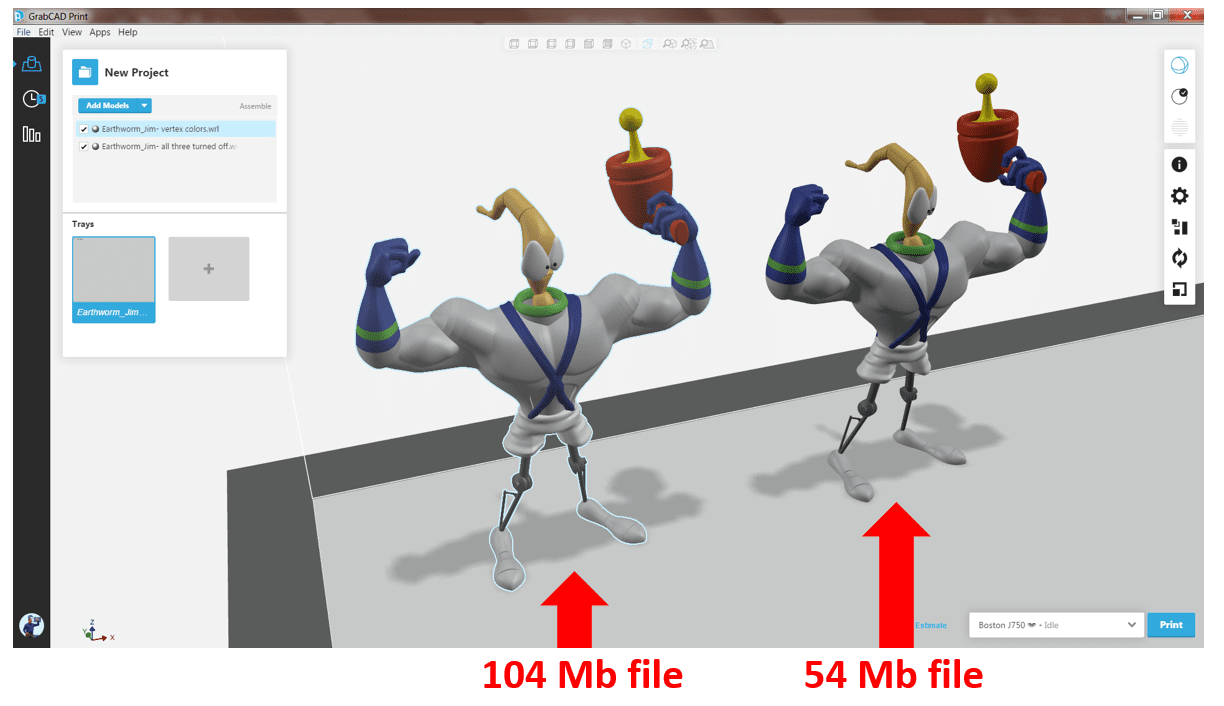
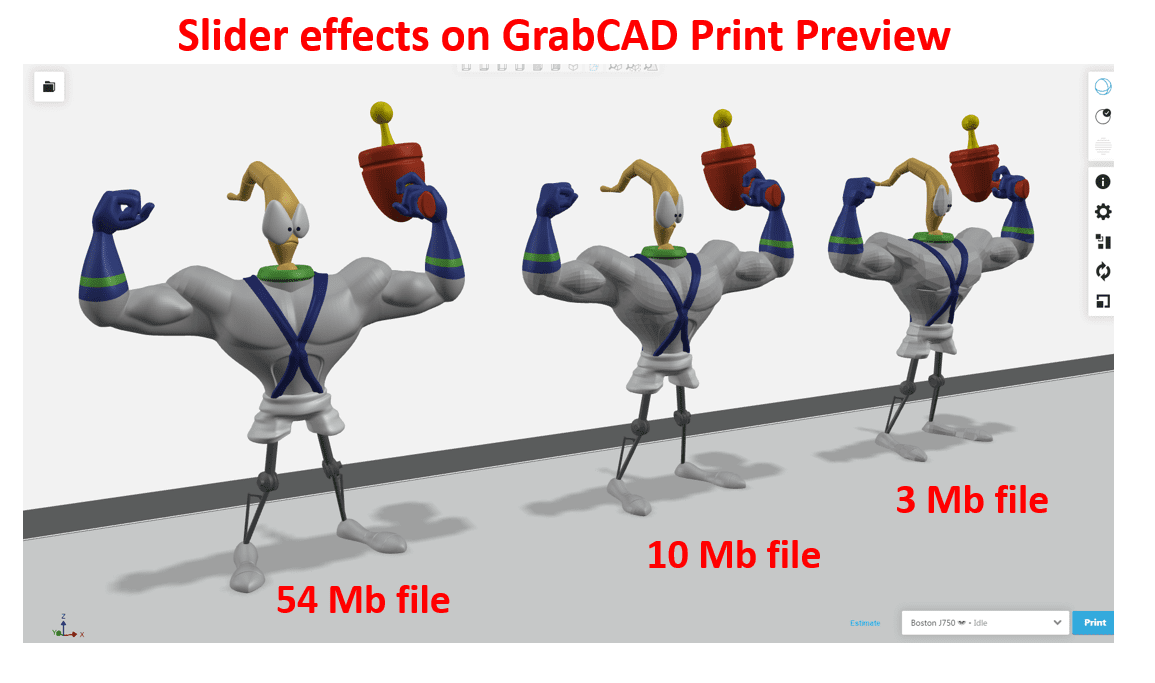
104 Mb is a big, single file, however not above the limit of what my computer can do. When you open both files side by side in GrabCAD Print, you don’t really notice a difference between them:
If you look at the above example, there are no gradients or blends in the colour files. The reason Jim is still in full colour, even on the non-ColourByVertex file, is that the VRML has a lot of different bodies in it, like his blue glove for example, which each contain their overall body colour info (all of glove = blue). If we wanted to apply gradients or image textures, we may export an STL and use Photoshop to save outa VRML, as done in Part 1 of this series.
To give a sense of scale, here is how the files would appear on the full J750 tray (with a 6-inch orange ruler for comparison)
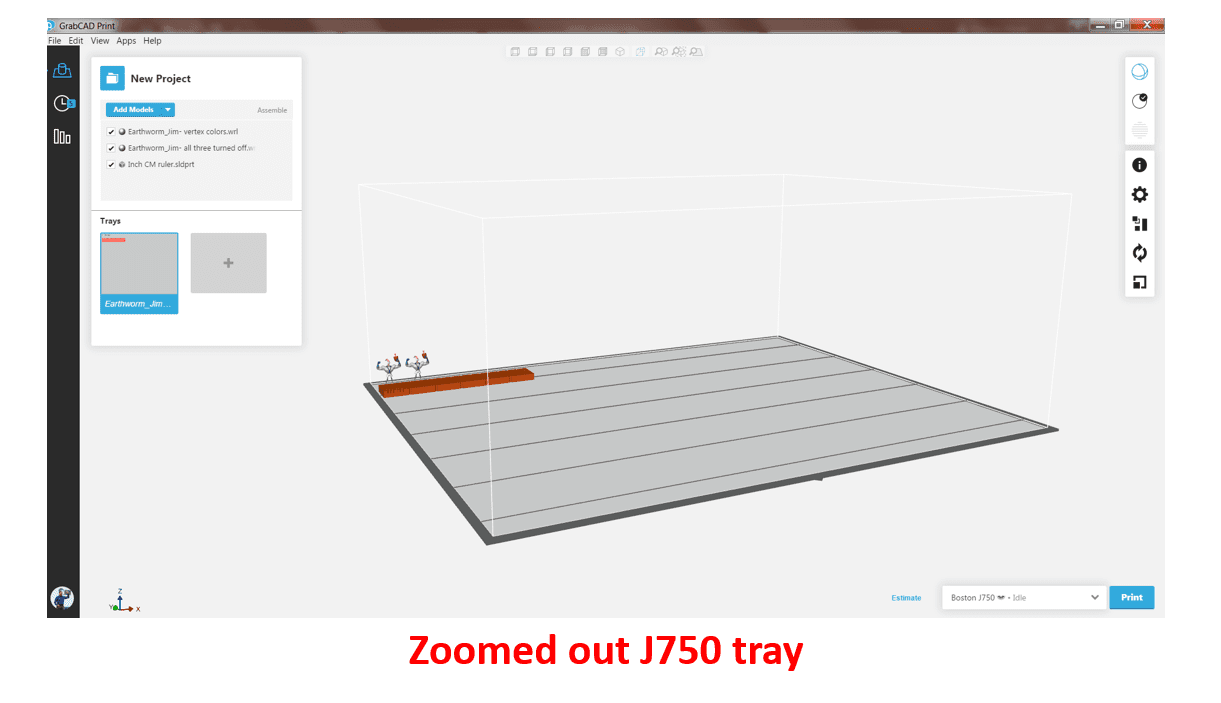
Do each of those small files need to be 104MB or 54MB, containing 28,000 triangles? If we wanted to print a hundred of those toys to fill up the tray, the file size may become an issue.
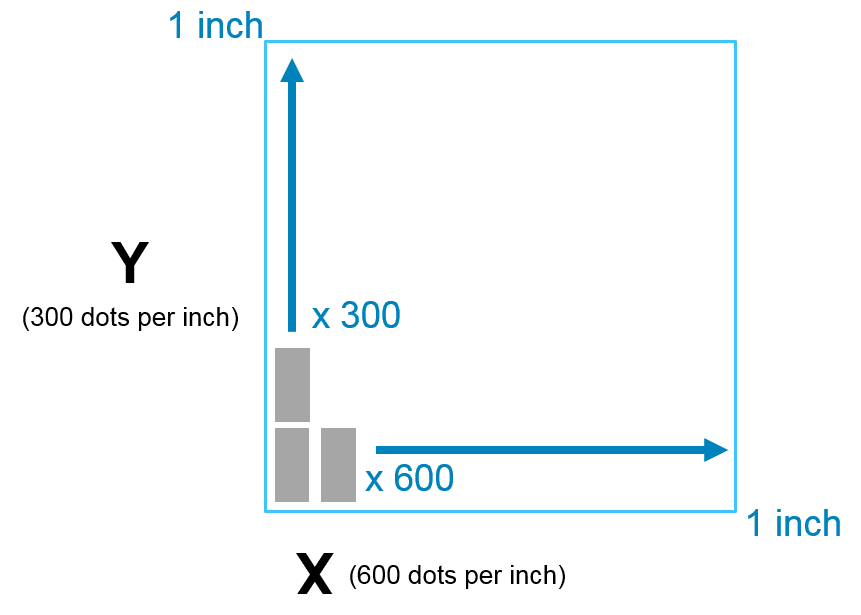
So, how can we choose which resolution to export files from, in artistic CAD programs that generate very dense meshes of triangles? It begins by knowing the fundamental resolution of your printer.
Interestingly enough, for a J750 polyjet 3D printer the main resolution is different than the X and Y directions, with the printer putting down 600 DPI x 300 DPI respectively. So if you had a 1-inch square you wanted to print, you could fill it with 600 coloured dots in one way and 300 in the other.
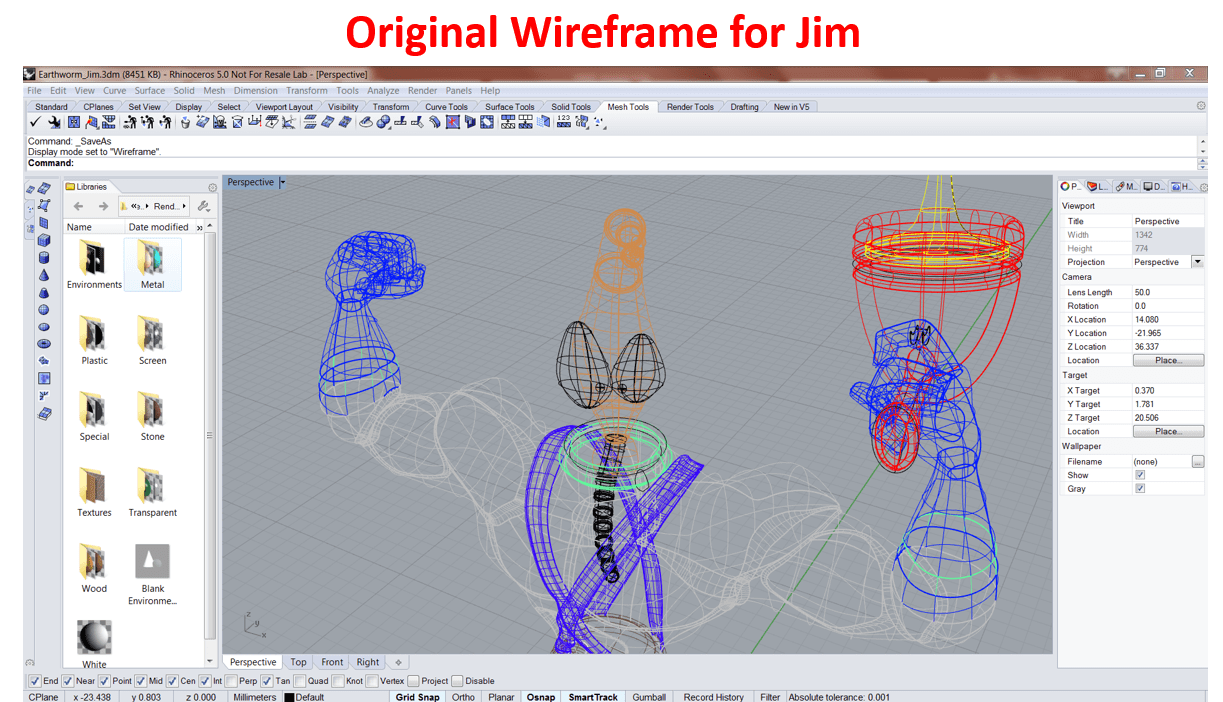
Because you aren’t printing in one direction and your part could be rotated to fit better on the tray during the final layout, let’s go with 300 DPI as our base. Now, taking a look at the original Earthman Jim in Rhino in Wireframe mode displays the curves are not anywhere close to 300 DPI:
However, taking a look at the preview when Rhino is creating our VRML, we can notice a certain- high-change areas such as the fingers or eyeballs probably have more triangles than required:
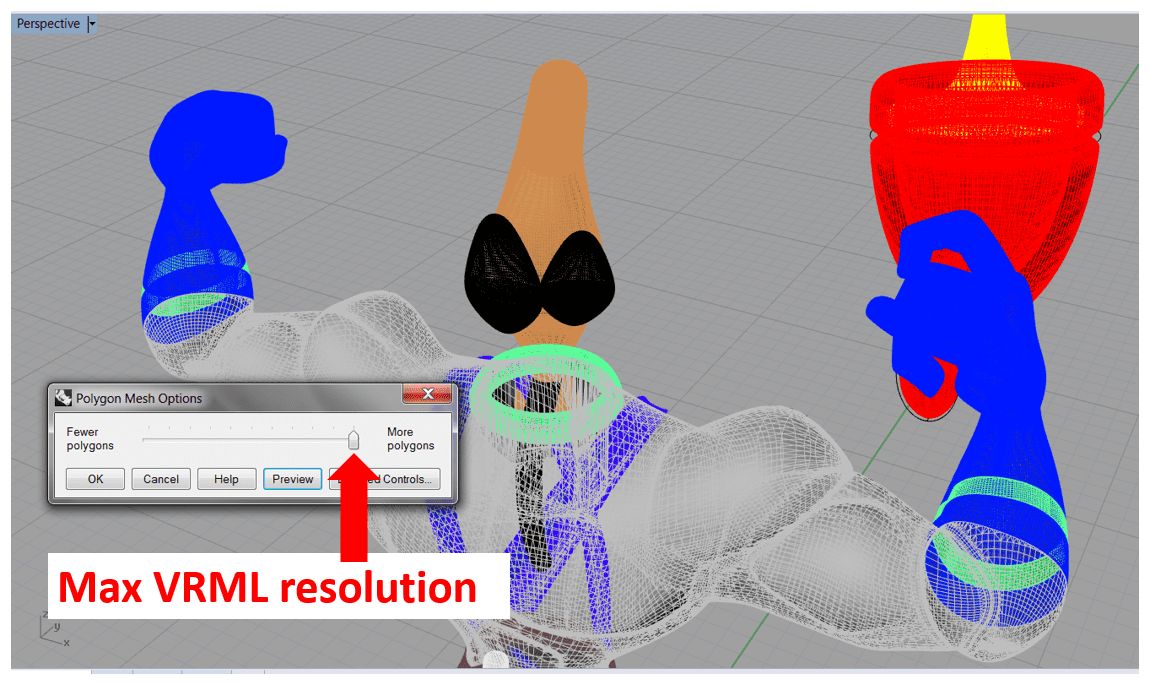

While having a Planck length of 300 DPI as an absolute lower boundary of what the printer can do, there are many triangles we can remove from that thumb and still have it look like a thumb after printing.
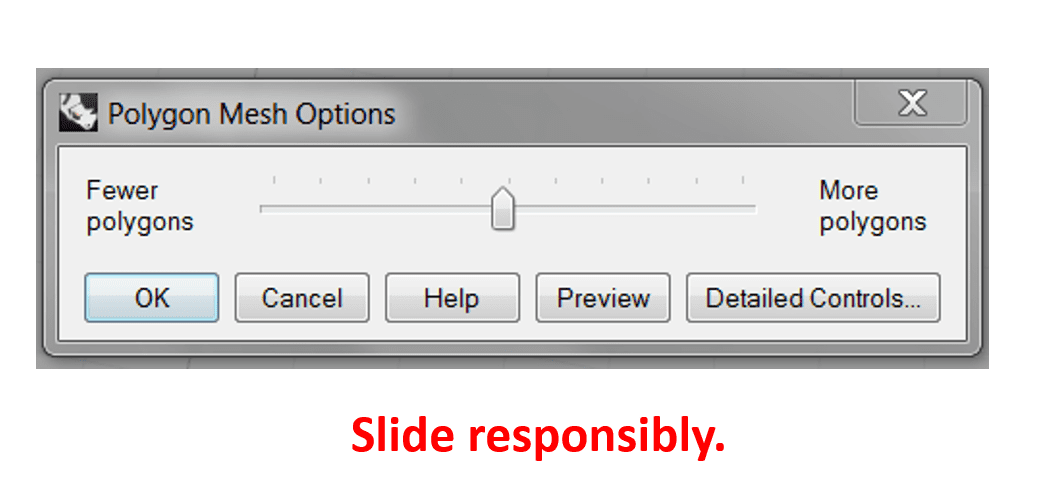
Below, there are a few examples of three different settings of that slider in Rhino, and the effect they have on the model size.
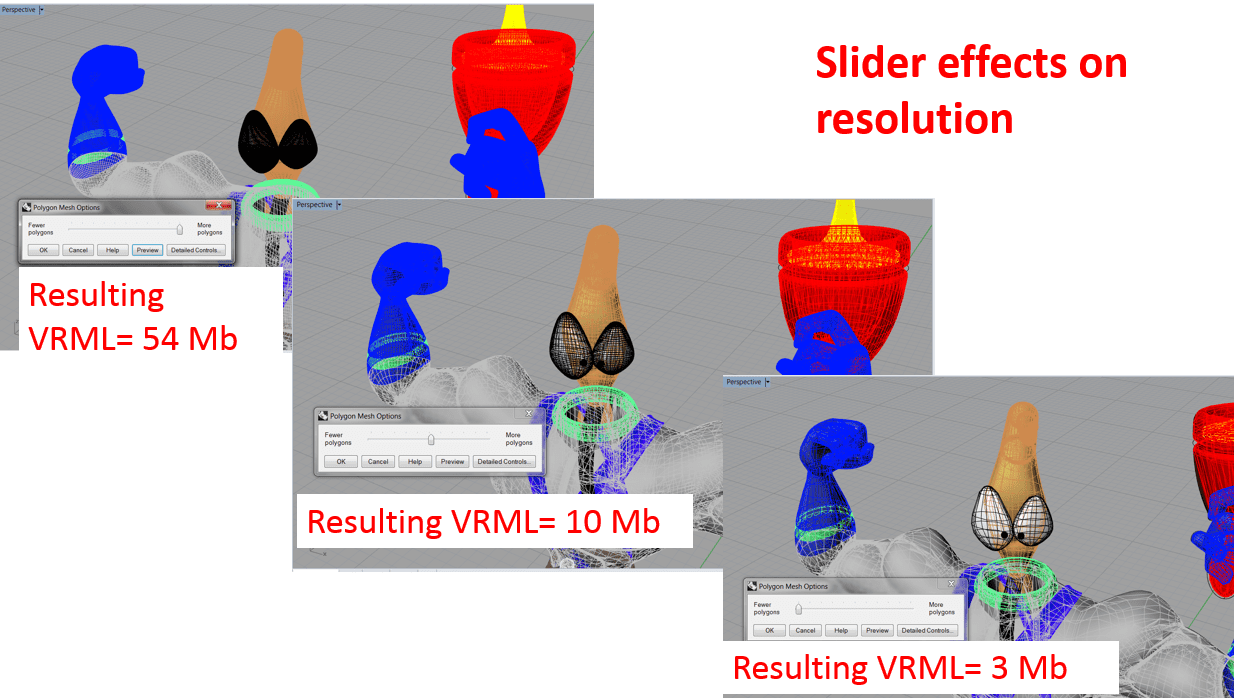
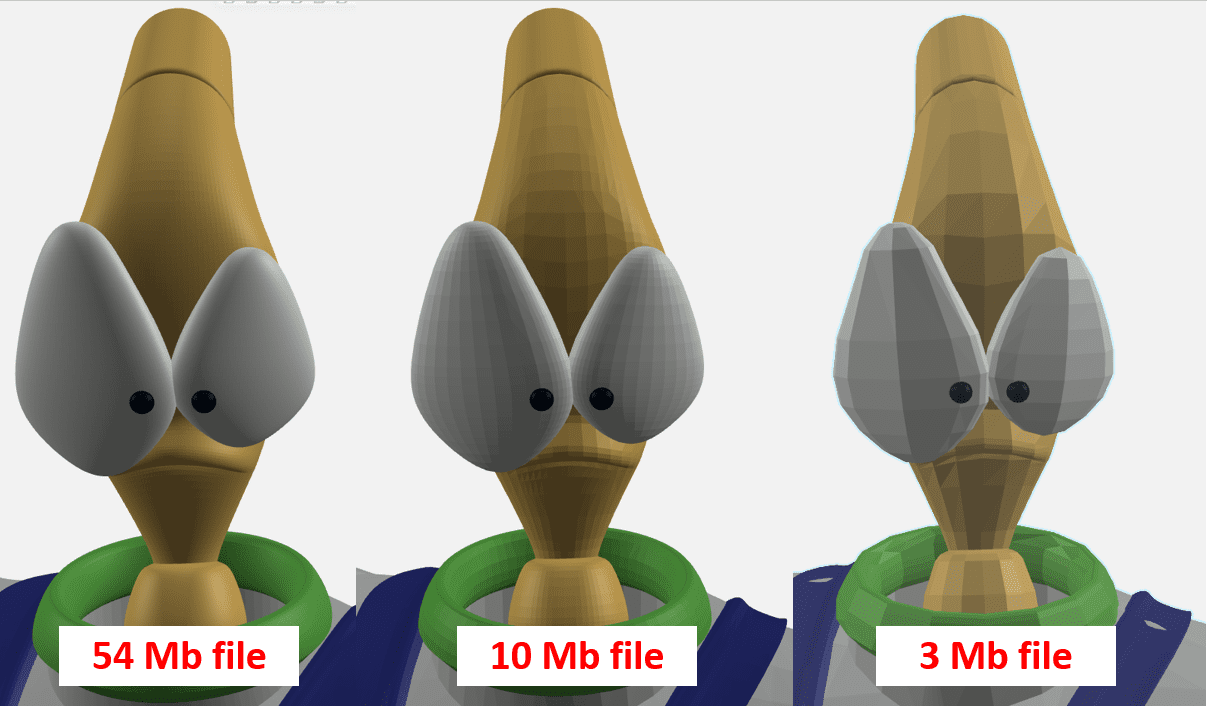
Now, that 3 Mb file looks bad, however, keep in mind Jim’s head is less than a third of a centimeter across. Printed out at normal size, you really may not see a huge difference. But scaling the model 10x or 100x on the tray, you might.
Summary
All in all, it depends on what your printing – however, we now know two tools used in Rhino that will greatly affect our VRML size. The first colour is “Colour By Vertex” which tends to be double the size:
You may also now know how to open a VRML in text and see if that colour by vertex data is there, giving an RGB colour for every triangle.
Finally, when selecting a resolution for your VRML, make sure to do a couple of test prints and always:
Step 5: Summary
When reading VRML files as text and changing the resolution on simple-coloured files (not textured) may seem like it has nothing to do with printing textured files, te steps learned in this tutorial assisted to troubleshoot so many issues we see with colour printing. Explore more on how the Stratasys J750 and their new vivid colour pallet can help you achieve even better colour 3D printing results with this helpful guide.
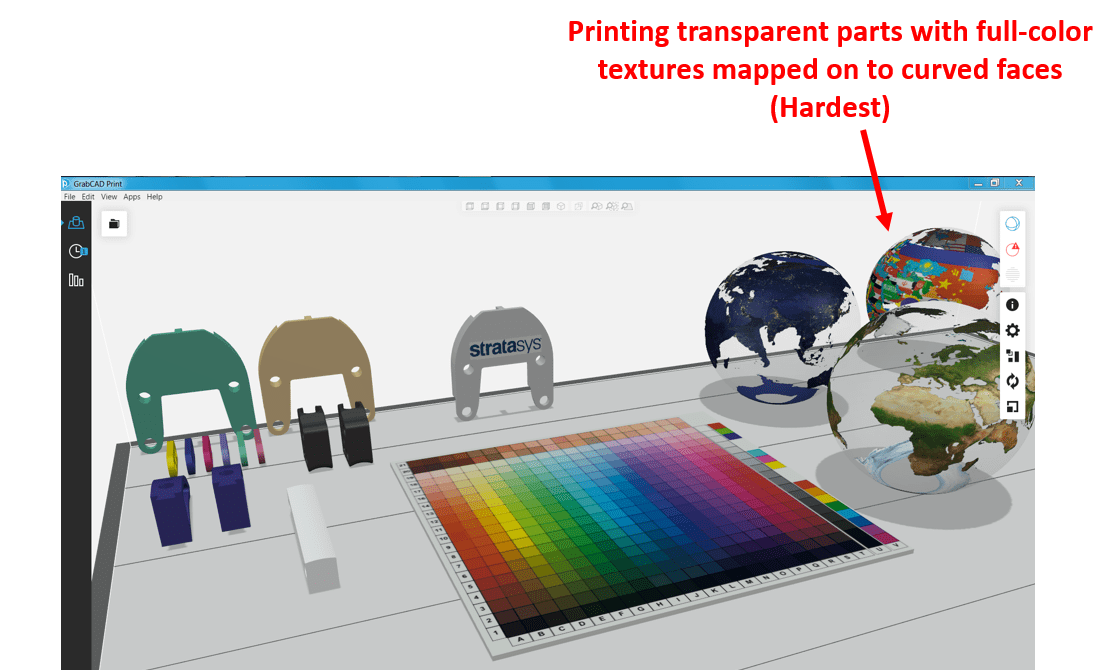
The next part of this tutorial includes getting into UV mapping and tackle the hardest thing you can do in colour printing: transparent shapes with semi-transparent textures wrapped around them: