This tutorial is a breakdown of a simpler workflow for applying full-colour textures to CAD parts for 3D printing if you are using SOLIDWORKS. It applies to anyone who has SOLIDWORKS Professional or Premium (2017+) since we will be using the new SOLIDWORKS Visualize tool to map the textures.
Step 1: Overview
In the very first tutorial about colour 3D printing, we went over how decals applied in SOLIDWORKS files don’t transfer over to GrabCAD Print.
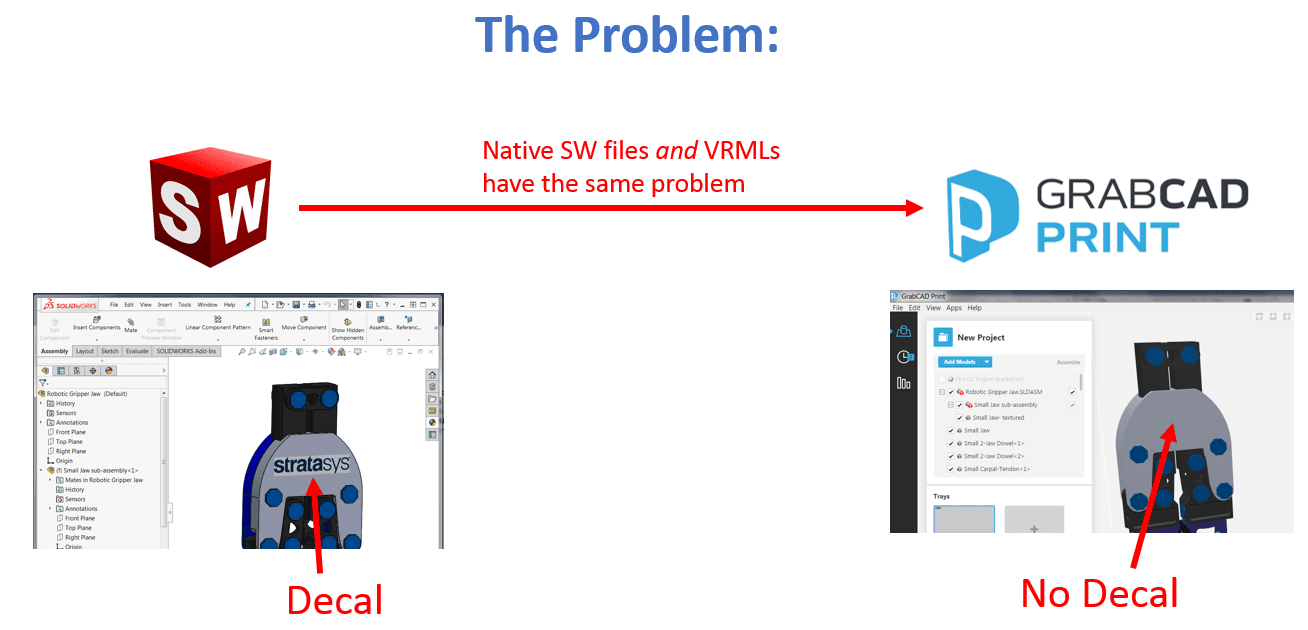
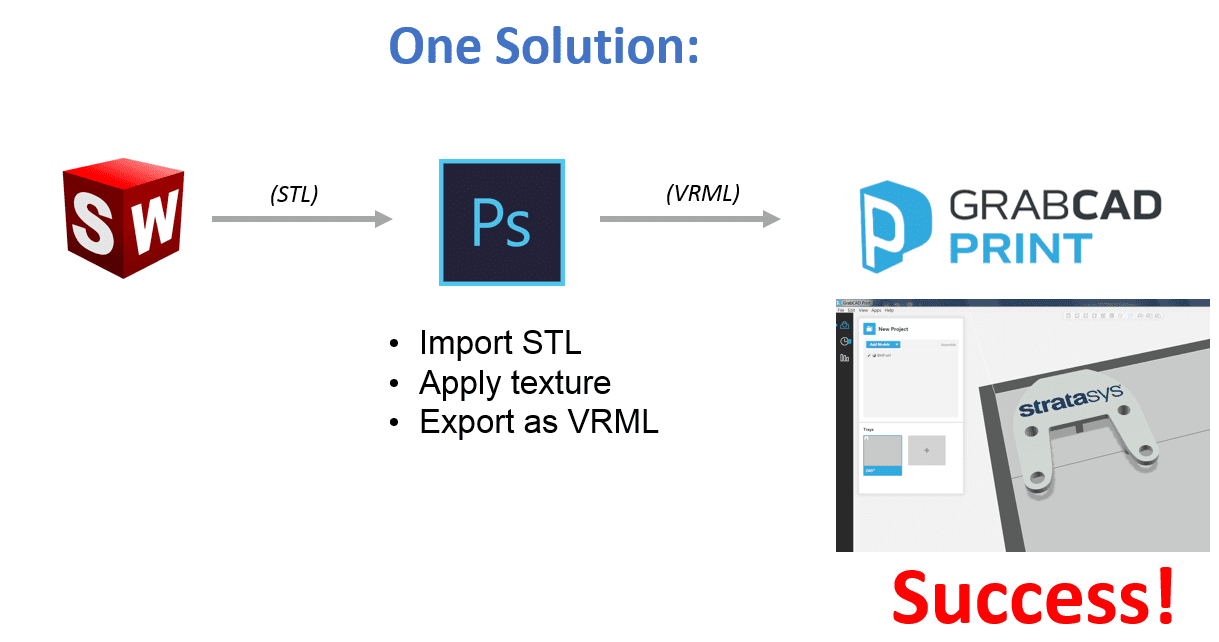
We also spoke about a fix that used Photoshop as a middleman:
However, some users started asking if there was not a way to avoid STL exports, to stay inside SOLIDWORKS more, and complaining that some types of texture mappings are hard to do in Photoshop (it’s a 2D program attempting to do 3D operations).
So after extensive research, we have found a workflow making things much easier in certain use cases and allows you to stay in the SOLIDWORKS eco-system a bit longer for texture mapping:
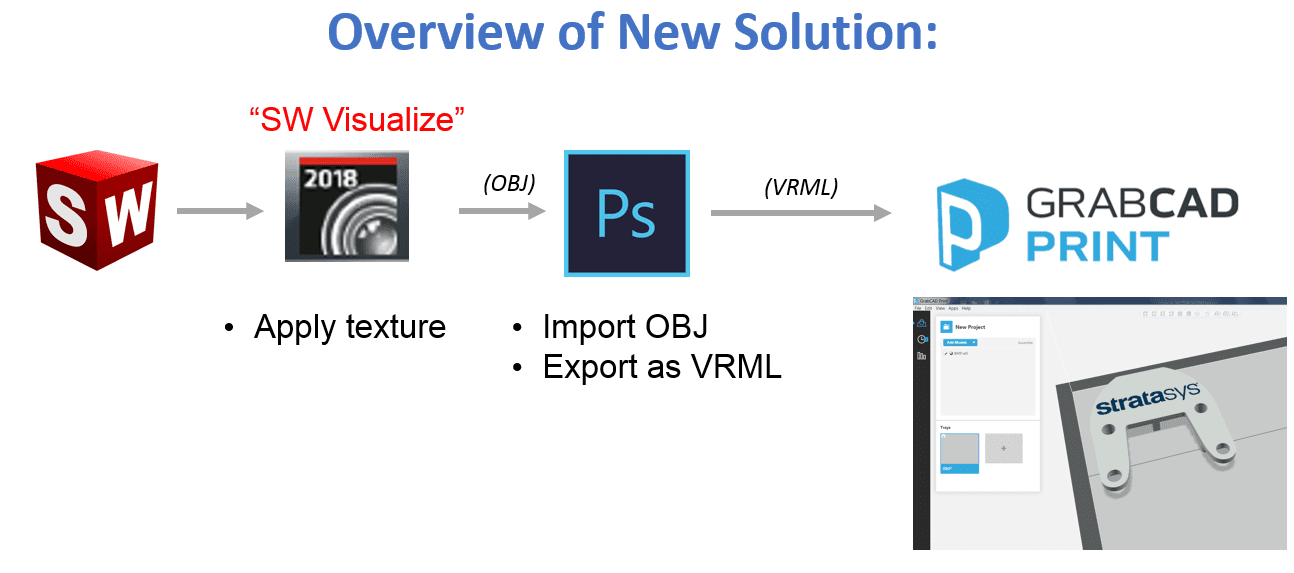
To the untrained eye, this could look like more steps (4 instead of 4) however it does have the benefits of using more than a 3D program to apply textures to 3D shapes (SW Visualize vs. Photoshop) and simplifying what you are doing in Photoshop (all you’re doing is importing an Obj and saving it right out as a VRML, with no changes). This workflow can be useful for specific shapes, especially where people know SOLIDWORKS a lot and Photoshop a little.
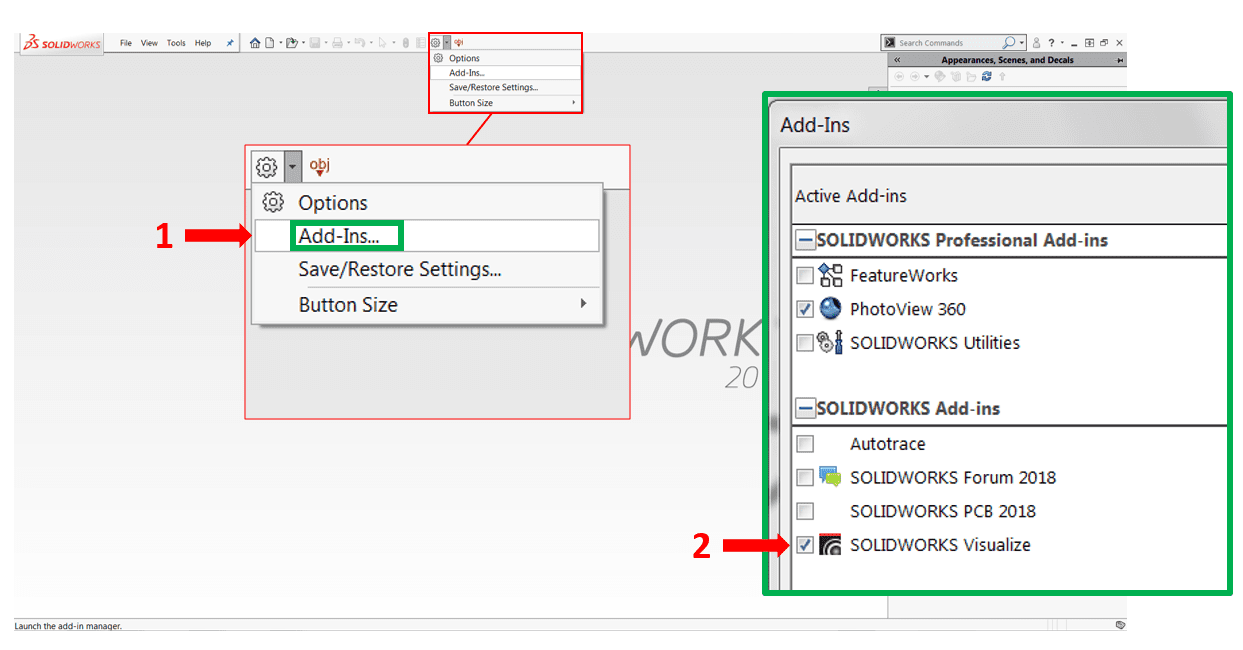
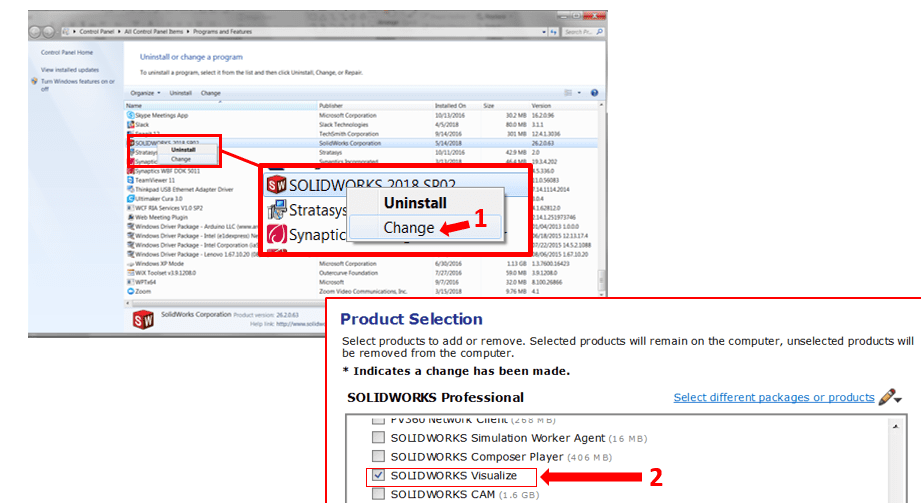
Step 2: Turning On The Visualize Add-In And Exporting The File
The first thing to do is to turn on your Visualize Add-in. This is made available for any SOLIDWORKS Premium or Professional user, in versions 2017+.
In your SOLIDWORKS application, go to “Tools….add-ins” and turn on “Visualize”.
If that still doesn’t seem to work, give us a call and ask why you do not have a Visualize license.
After the add is loaded, you’ll see a new toolbar in the Command Manager when you have a part open:
With your part open in SOLIDWORKS, hit the “Export Advanced” button and Visualize will open as a separate window, with your part already loaded.
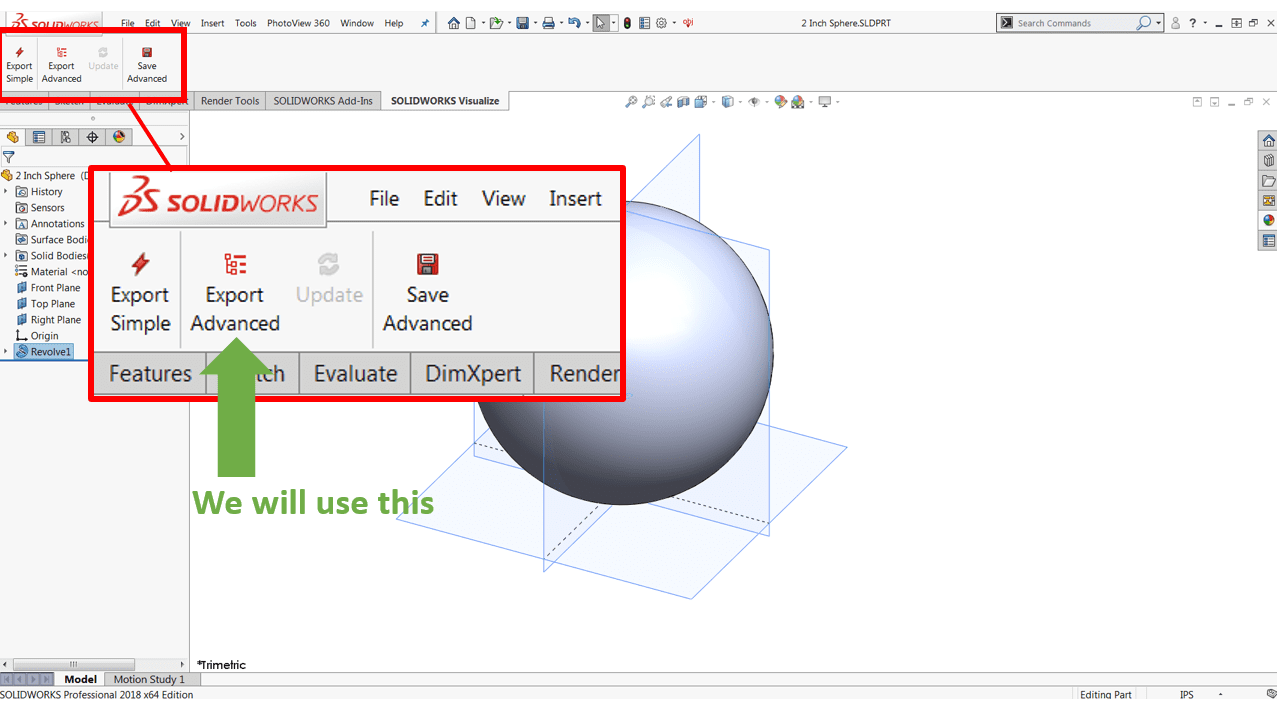
Next comes the most difficult step: applying the texture in Visualize.
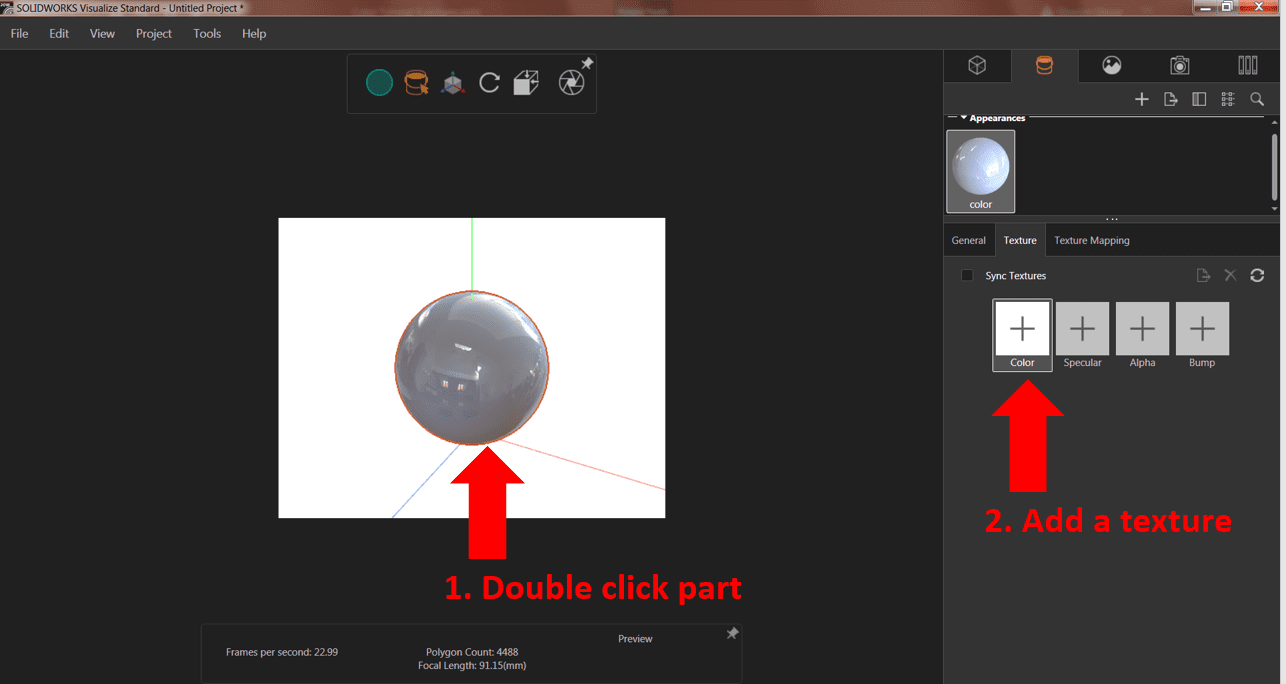
Step 3: Applying Textures In Visualize
There are many excellent tutorials on SOLIDWORKS Visualize already. We will obviously use this 2-inch sphere again, to print a transparent globe like in the Clear + Texture tutorial.
You will have to double-click your part and then hit the big “+” button to apply a “colour” texture:
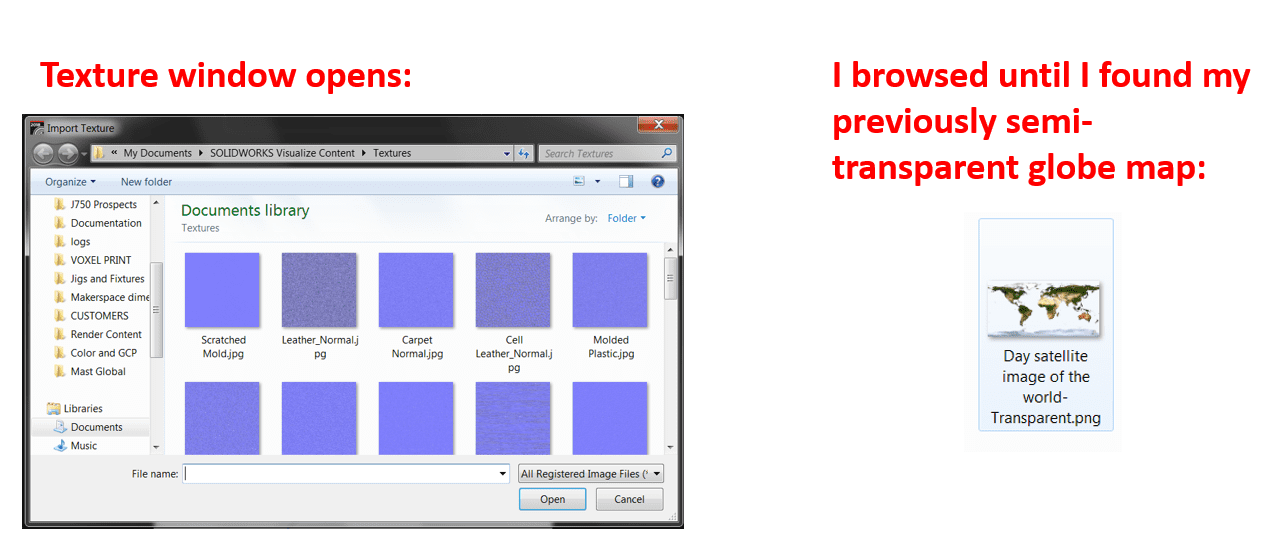
Selecting that PNG for the above sphere, the preview looks pretty good, however, the real power of this approach lies if we click on the “Texture Mapping” tab:
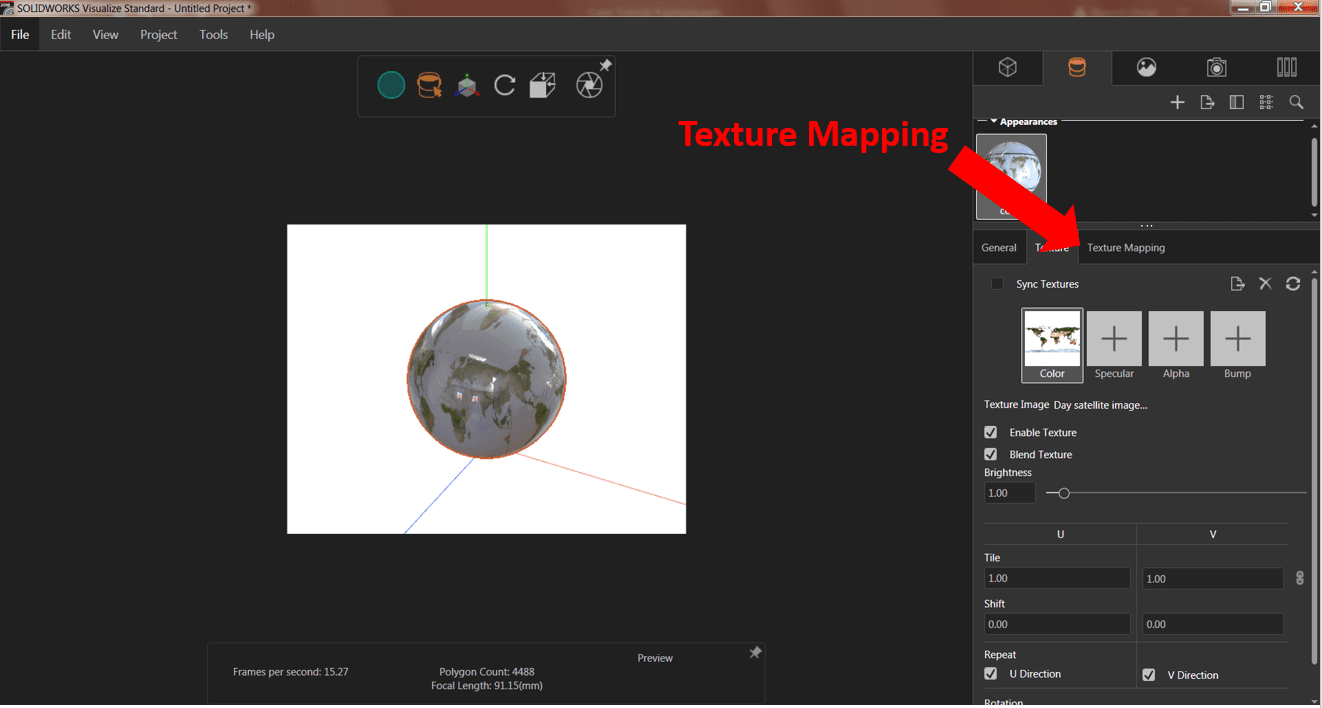
This tab is what separates this workflow from applying textures in Photoshop. In that workflow, for a sphere, you had to manually lay a 2D image over a strange, cut-up UV map of your unfolded shape.
Here, there are a few pre-defined mapping “Modes” that make a lot of difference:
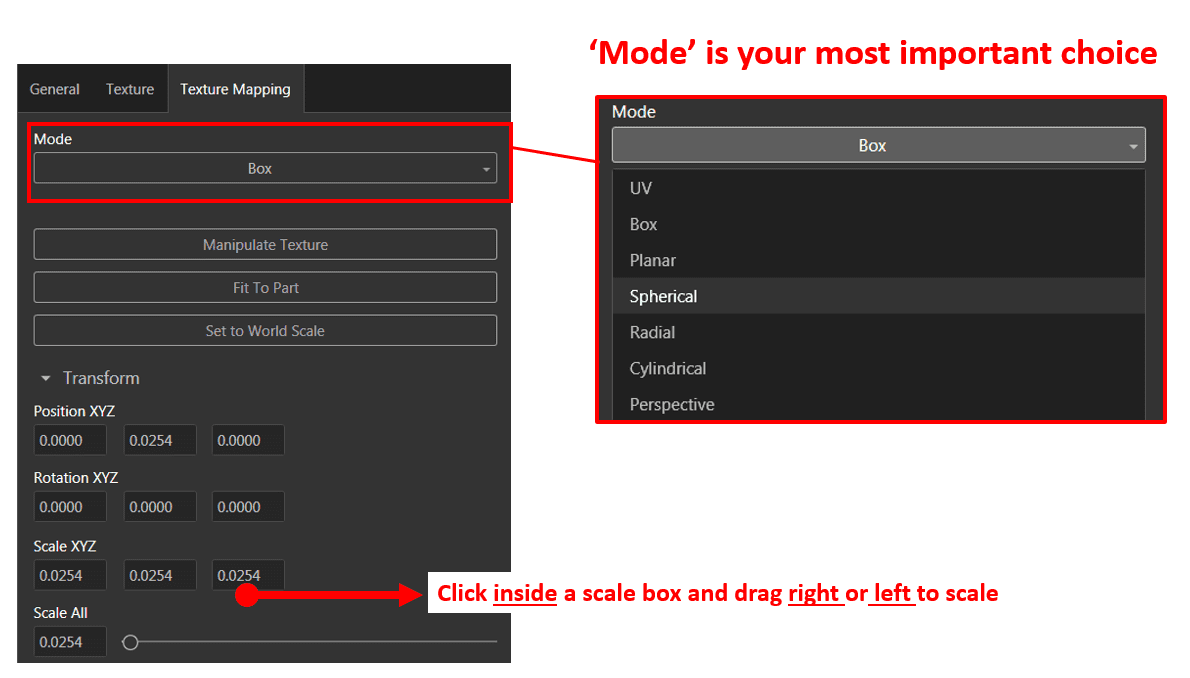
The scale boxes are also great once you get a hang of them. There are no handles, you left click inside the box and drag to the right or left to scale, rotate, position, etc. It’s a very powerful system, after having used it a few times.
However, getting back to the modes, they make a HUGE difference in how your image lays across your shape:
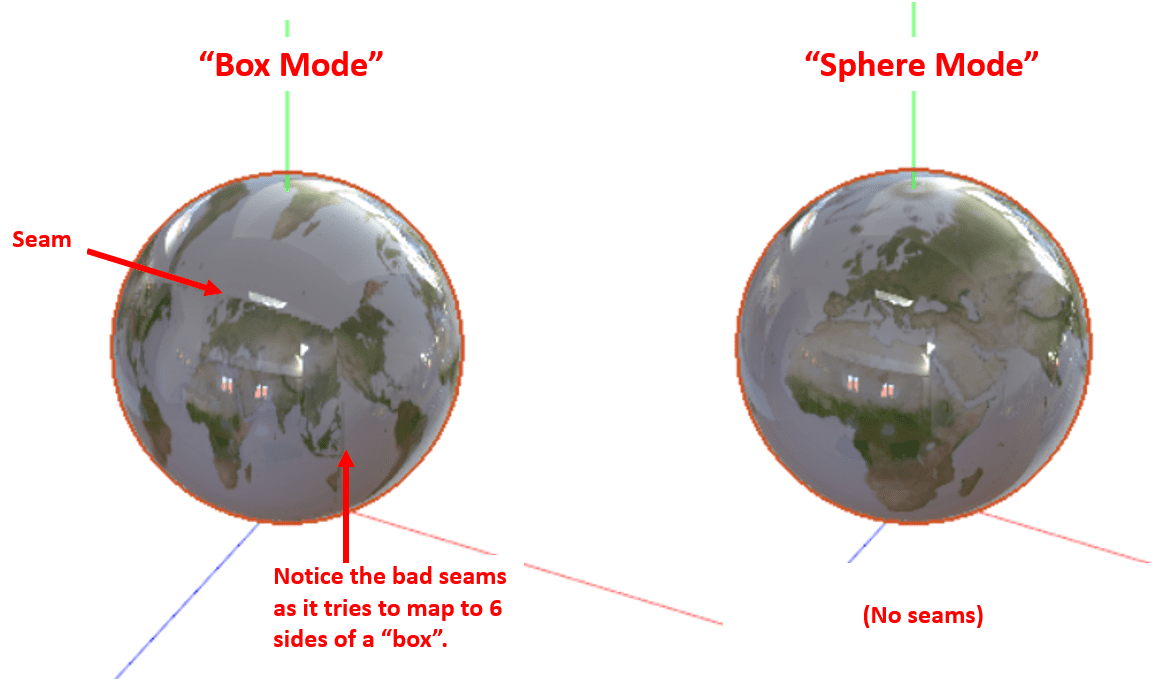
And of course, “Sphere Mode” really works out well for our shape here. That is a key takeaway in the short time using this workflow.
If you are mapping over a 3D shape close to one of the modes, texture mapping in SOLIDWORKS Visualize works really well. If not, it may be better to use Photoshop or artistic CAD (Rhino, Maya, etc).
An example of this would be mapping textures over boxes, spheres, cylinders are very simple and controllable in Visualize. However, the moment that the example tries to map over a hollow half-cylinder (think of a cut in half soda can), Visualize gave a lot of trouble, since “half cylinder” was not one of the modes.
Texture mapping can be difficult even for the experts using expert programs, so this is certainly a learning curve area, however,r if you’ve got something close to a sphere, cylinder or cube, Visualize does make it quicker and easier for SOLIDWORKS users. Now, let’s move on to exporting that shape and prepare it for printing!
Step 4: Exporting For Printing
With your model selected in Visualize, go to “File…Export” and choose the selected model:
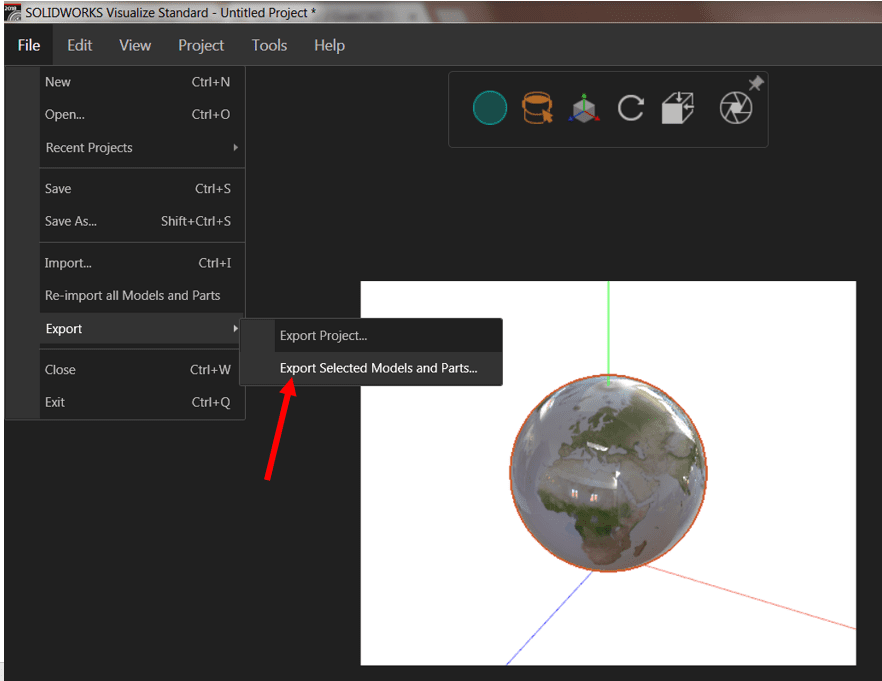
This allows you to save as an .OBj or .FBX file. If you’ve read the previous tutorials, you will know that GrabCAD Print can’t read in textured OBJ files, but Photoshop can!
So, we use Photoshop as a quick converter. To quickly recap the steps in that previous tutorial, you’re going to:
- Open a new Photoshop document, at whatever size.
- Create a new 3D layer, importing your .OBJ file (picture below)
- Export that 3D layer as a VRML (second picture below)
- Import that fully textured VRML into GrabCAD Print (last picture below)
To control the infill colour (labelled as the black seas above), you must edit the solid bodies properties in Photoshop, but for simple textures that cover the entire model, you won’t need to and this workflow will work fine.
Step 5: Summary
After experimenting with different colours, below is an image that shows the many ways things don’t work, a few ways they do, and in this age of new colour printers and CAD software being added every day – the job of the engineer or operator is to test, produce, and keep track of charts such as the one below:
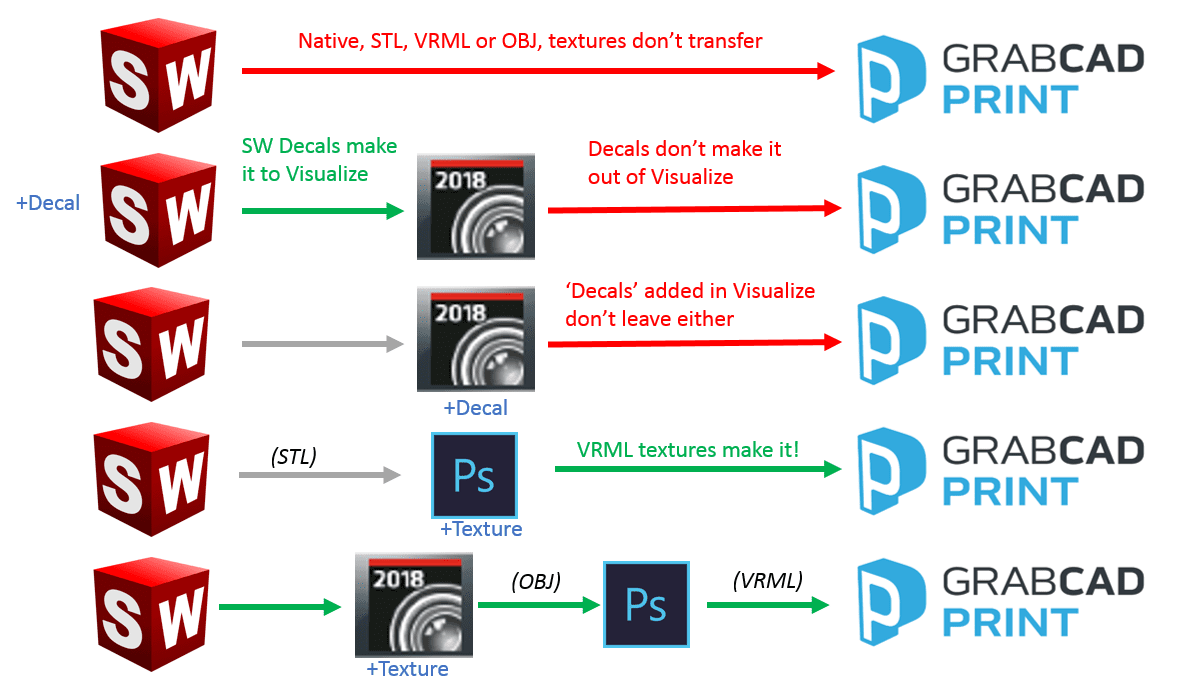
This is so that we can ensure we get the final, printed product.